Growing arugula microgreens at home is one of the most rewarding ways to add fresh, nutrient-dense greens to your urban gardening routine. These peppery little powerhouses pack incredible nutrition into tiny leaves and can transform any small space into a productive growing area.
Whether you’re living in a city apartment or just starting your microgreens journey, arugula microgreens offer the perfect combination of fast growth, exceptional nutrition, and bold flavor that makes home growing both practical and delicious.
Key Takeaways
- Fast Growth: Ready to harvest in just 8-12 days
- Nutritional Powerhouse: 8x more calcium than iceberg lettuce
- Space-Efficient: Perfect for urban gardeners and small spaces
- No Soaking Required: Direct sowing makes them beginner-friendly
- Versatile Flavor: Peppery and nutty taste enhances any dish
Arugula Microgreens Nutrition: A Nutritional Powerhouse
Understanding arugula microgreens nutrition reveals why these tiny greens have become a favorite among health-conscious urban gardeners. Research shows that microgreens can contain 4-40 times higher levels of vital nutrients compared to their mature counterparts, making them an incredibly efficient way to boost your daily nutrition intake.
Nutritional Profile Comparison
Compared to iceberg lettuce, arugula microgreens contain:
- 8x more Calcium for bone health
- 5x more Vitamin A for eye health
- 5x more Vitamin C for immune support
- 5x more Vitamin K for blood clotting
- 4x more Iron for energy production
Complete Nutritional Breakdown
Vitamins
- Vitamin A (Beta-carotene)
- Vitamin B2 (Riboflavin)
- Vitamin C (Ascorbic acid)
- Vitamin E (Tocopherol)
- Vitamin K (Phylloquinone)
- Folate
Minerals
- Calcium
- Iron
- Magnesium
- Phosphorus
- Potassium
- Niacin
Additional Benefits
- 20-25% Protein content
- Antioxidants
- All essential amino acids
- High fiber content
- Anti-inflammatory compounds
- Cancer-fighting properties
How to Grow Arugula Microgreens: Step-by-Step Guide
Learning how to grow arugula microgreens is straightforward once you understand the basic principles. This comprehensive guide will take you through each stage of the growing process, from setup to harvest, ensuring you get the best results every time.
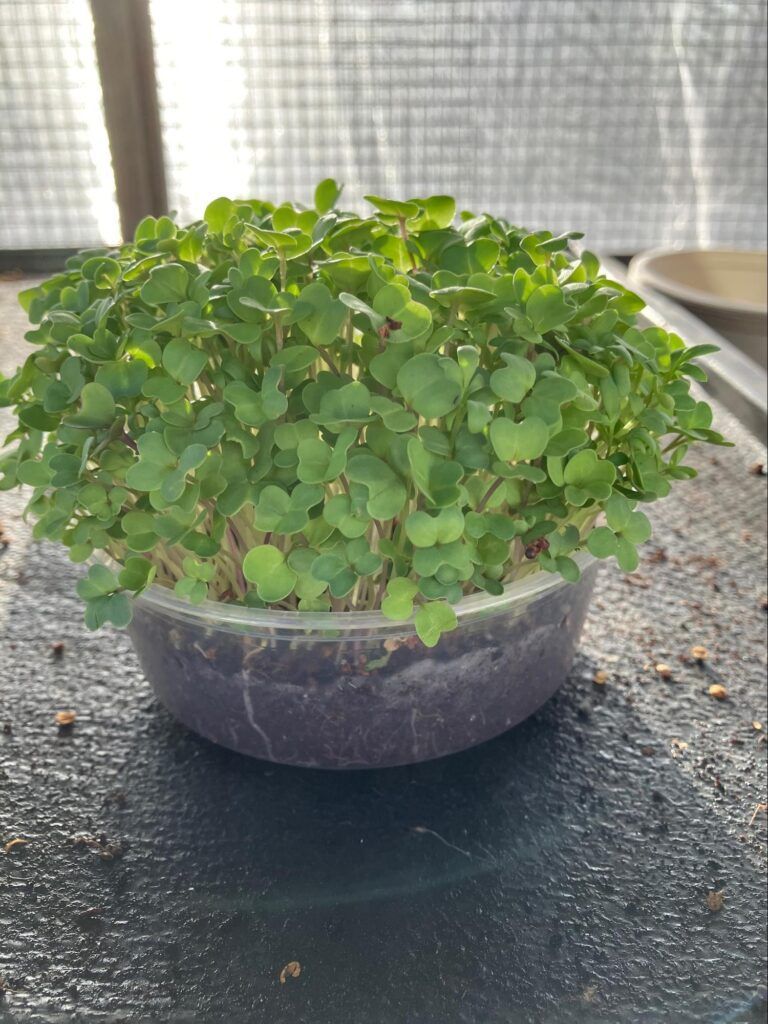
Visual Growth Timeline
Day 1-2
Sowing & Germination
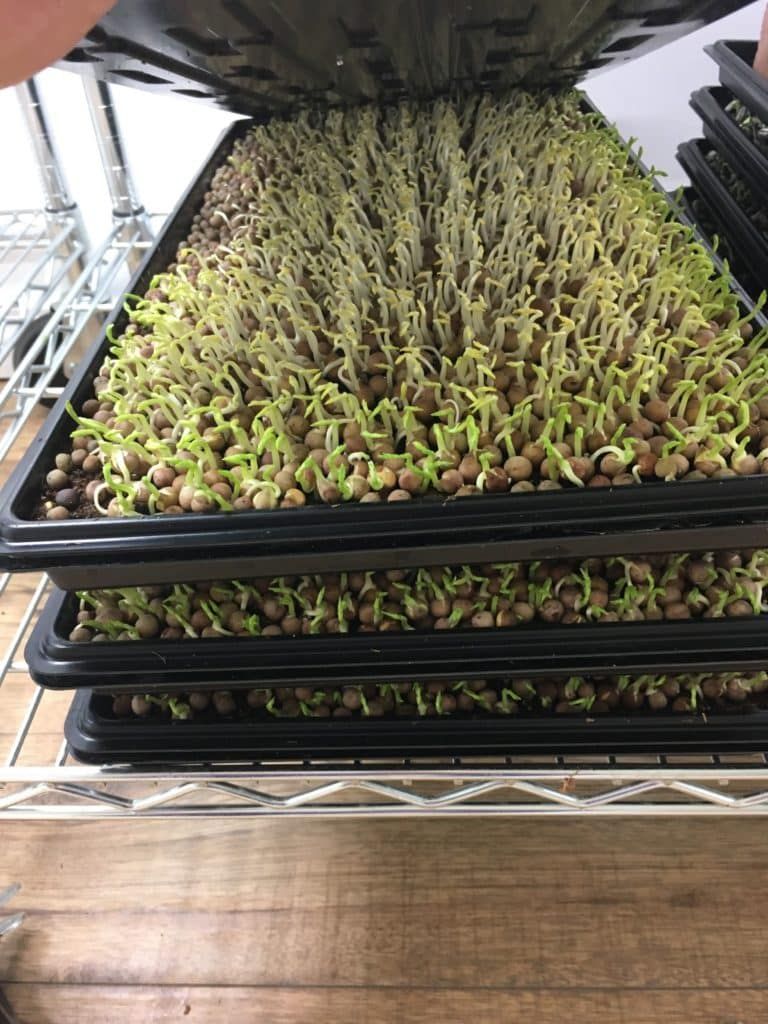
Day 3-4
Early Sprouting
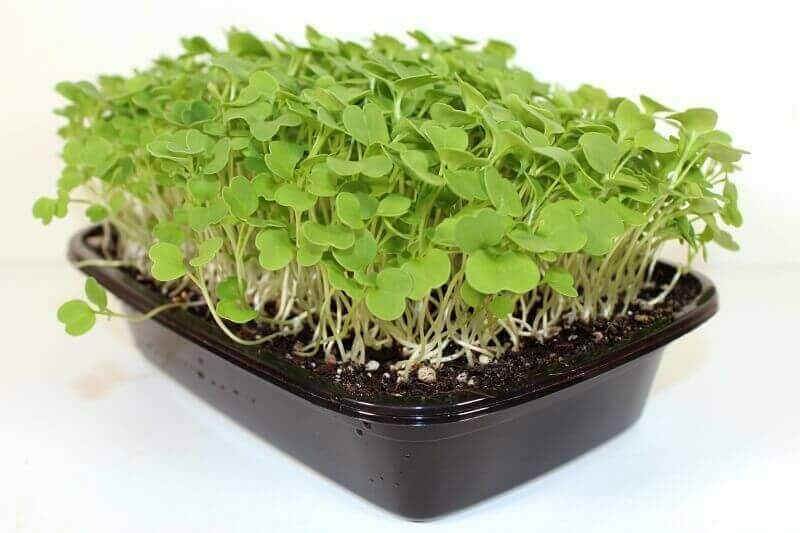
Day 5-7
Rapid Growth
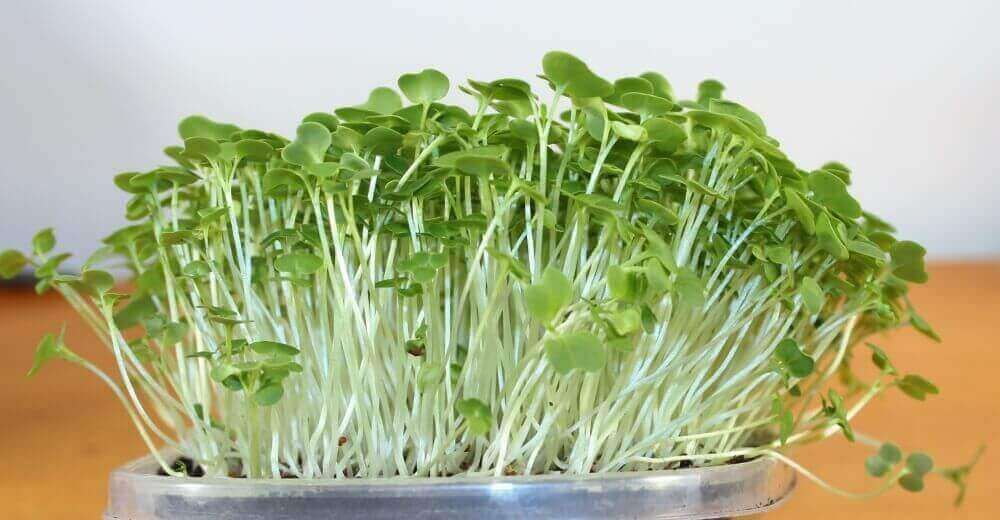
Day 8-12
Harvest Ready

Step 1: Gather Your Supplies
Essential Equipment:
- Growing trays (5″ x 5″ minimum)
- Drainage trays or holes
- Growing medium (potting soil or coco coir)
- Arugula microgreen seeds
- Spray bottle for misting
- Blackout cover (plate or tray)
- Clean scissors for harvesting
Step 2: Prepare Your Growing Tray
Start by ensuring your tray has adequate drainage. Pierce 6-8 holes in the bottom if using aluminum trays, or use trays with pre-made drainage holes. Fill the tray with about ½ inch of your chosen growing medium, creating a flat, even surface that’s crucial for uniform growth.
Pro Tip: Lightly press down the growing medium to eliminate air pockets, but don’t compact it too firmly as roots need room to breathe.
Step 3: Sow Arugula Microgreen Seeds
Unlike many other microgreens, arugula microgreens seeds should NOT be soaked before planting. Arugula seeds are mucilaginous, meaning they develop a gel-like coating when wet, which can actually hinder germination if pre-soaked.
Seeding Instructions:
- Use 1-2 teaspoons of seeds per 5″ x 5″ tray
- Sprinkle seeds evenly across the surface
- Gently press seeds into the medium
- Don’t cover seeds with additional soil
Seeding Density Guide
Proper seed density is crucial for healthy growth. Too dense and plants compete for light and nutrients; too sparse and you waste growing space. Aim for seeds to be nearly touching but not overlapping.
Step 4: Initial Watering and Blackout Period
Immediately after sowing, mist the seeds thoroughly with clean water until the growing medium is damp but not waterlogged. The goal is to provide enough moisture for germination without creating soggy conditions that promote mold growth.
Blackout Period (Days 1-4):
Cover your tray completely to block all light. This blackout period encourages the seeds to put energy into germination and root development rather than photosynthesis. You can use:
- Another tray flipped upside down
- A plate or cardboard
- A dark towel or cloth
Daily Check: Lift the cover once daily to mist if the surface appears dry. Replace cover immediately.
Step 5: Light Exposure and Care
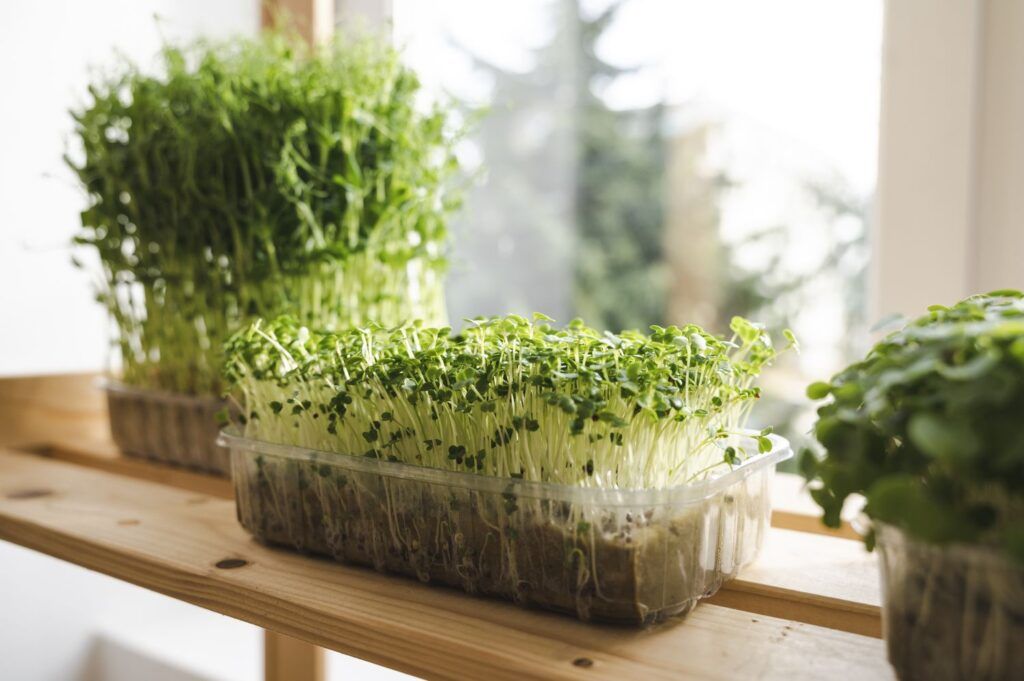
When sprouts reach about ½ inch tall (typically day 3-4), remove the blackout cover and introduce them to indirect light. This is when you’ll see the dramatic green-up process as chlorophyll develops in the leaves.
Lighting Requirements:
- Natural Light: Bright, indirect sunlight
- Artificial Light: LED grow lights 12-16 hours daily
- Location: South or east-facing window
- Avoid: Direct sunlight (causes wilting)
Step 6: Watering During Growth Phase
Maintaining proper moisture levels is critical for healthy arugula microgreens. The key is consistency – keeping the growing medium moist but never waterlogged.
Watering Schedule and Technique:
Bottom Watering (Preferred):
- Place tray in larger container
- Add water to outer container
- Let medium absorb water from below
- Remove when surface feels moist
Top Misting (Alternative):
- Use fine mist spray bottle
- Mist 1-2 times daily
- Check soil moisture with finger
- Avoid overwatering to prevent mold
Step 7: Harvest Your Arugula Microgreens
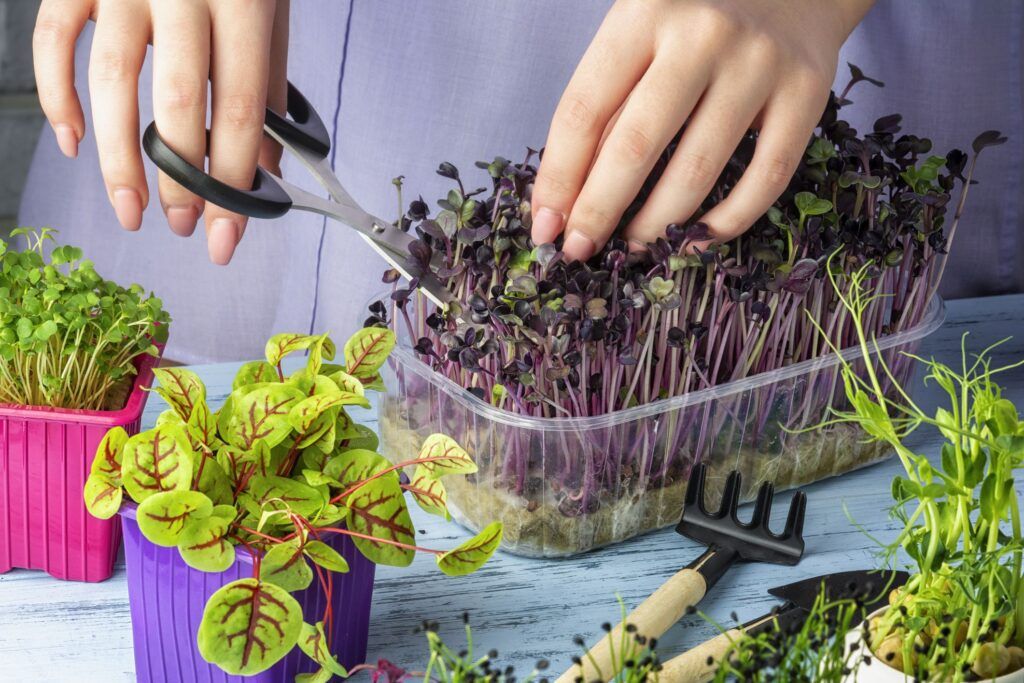
After 8-12 days, your arugula microgreens will be ready for harvest. Look for these signs: cotyledons (seed leaves) are fully expanded, plants are about 2 inches tall, and the first true leaves may be appearing.
Harvesting Steps:
- Stop watering 12 hours before harvest
- Use clean, sharp scissors
- Cut just above soil level
- Rinse gently in cool water
- Pat dry with paper towel
Storage Tips:
- Use immediately for best flavor
- Store in refrigerator up to 1 week
- Keep in slightly damp paper towel
- Place in breathable container
- Avoid plastic bags (promotes moisture)
Urban Gardening Tips: Grow Arugula Microgreens at Home
Learning how to grow arugula microgreens at home in urban environments requires understanding the unique challenges and opportunities that city living presents. With limited space and variable light conditions, urban gardeners need specific strategies to succeed with microgreens.
Space Optimization Strategies
- Vertical Growing: Stack trays with proper spacing for air circulation
- Window Utilization: Maximize south and east-facing windows
- Counter Space: Use kitchen counters near windows for convenient care
- Apartment Balconies: Protected outdoor spaces work excellently
Climate Control in Urban Spaces
- Temperature: Maintain 60-75°F for optimal growth
- Humidity: Urban environments often need humidity control
- Air Circulation: Use small fans to prevent mold in tight spaces
Urban Growing Equipment Recommendations
Lighting Solutions
- LED grow light strips
- Full-spectrum desk lamps
- Timer-controlled lighting
- Adjustable height fixtures
Space-Saving Containers
- Shallow growing trays
- Stackable containers
- Window box planters
- Repurposed food containers
Urban-Friendly Tools
- Small spray bottles
- Kitchen scissors
- Digital thermometer
- Compact storage solutions
Troubleshooting Common Problems
Even experienced growers encounter challenges when learning care while growing arugula microgreens. Understanding common problems and their solutions helps ensure consistent success with your microgreens garden.
Problem: Mold Growth
Symptoms:
- White, fuzzy growth on soil surface
- Musty smell from growing tray
- Slow or stunted plant growth
- Discolored or wilted seedlings
Solutions:
- Improve air circulation around trays
- Reduce watering frequency
- Use bottom watering method
- Increase light exposure
- Discard severely affected trays
Prevention: Maintain proper spacing between seeds, ensure adequate drainage, and avoid overwatering.
Problem: Leggy or Weak Growth
Symptoms:
- Tall, thin stems
- Plants falling over
- Pale or yellowing leaves
- Uneven growth patterns
Solutions:
- Increase light intensity or duration
- Move trays closer to light source
- Reduce blackout period if too long
- Check for proper seed density
Problem: Poor Germination
Symptoms:
- Few seeds sprouting after 3-4 days
- Uneven germination patterns
- Seeds remaining dry on surface
- Slow emergence from soil
Solutions:
- Check seed freshness and quality
- Ensure consistent moisture during blackout
- Verify proper temperature (65-75°F)
- Avoid pre-soaking arugula seeds
Problem: Uneven Growth
Symptoms:
- Some areas dense, others sparse
- Different height plants in same tray
- Patches of slower growth
- Irregular leaf development
Solutions:
- Improve seed distribution technique
- Level growing medium surface
- Ensure even watering coverage
- Rotate trays for uniform light exposure
Adapting to Different Climate Conditions
Growing arugula microgreens successfully requires understanding how to adapt your methods to different seasonal and regional climate conditions. Whether you’re dealing with hot summers, cold winters, or high humidity, these strategies will help you maintain consistent harvests year-round.
Hot Weather Challenges
Common Issues:
- Rapid moisture loss
- Heat stress on seedlings
- Increased risk of bacterial growth
- Accelerated growth cycles
Adaptation Strategies:
- Move growing areas to cooler locations
- Increase watering frequency but smaller amounts
- Use shade cloth or move away from direct sun
- Monitor more frequently during heat waves
- Consider growing indoors with AC during extreme heat
High Humidity Conditions
Common Issues:
- Increased mold and fungal risk
- Slower soil drying
- Poor air circulation effects
- Difficulty maintaining proper moisture balance
Adaptation Strategies:
- Increase air circulation with fans
- Reduce watering frequency
- Use bottom watering exclusively
- Space trays further apart
- Consider dehumidifiers for indoor growing
Hot Weather Challenges
Common Issues:
- Slower germination rates
- Extended growing periods
- Reduced natural light
- Risk of freezing outdoors
Adaptation Strategies:
- Move operations completely indoors
- Use LED grow lights for 14-16 hours daily
- Maintain room temperature between 65-75°F
- Extend growing period by 2-4 days
- Consider heat mats for germination
High Humidity Conditions
Common Issues:
- Rapid moisture evaporation
- Difficulty maintaining humidity
- Risk of soil becoming too dry
- Potential for salt buildup
Adaptation Strategies:
- Check moisture levels twice daily
- Use humidity domes during germination
- Mist air around trays (not directly on plants)
- Cover exposed soil with damp paper towel
- Group trays together to create microclimate
Seasonal Growing Calendar
Spring
Ideal growing conditions, natural light increasing, moderate temperatures
Summer
Move indoors during heat waves, increase watering frequency, provide shade
Fall
Great growing season, prepare for reduced natural light
Winter
Indoor growing only, supplement with grow lights, extend growing time
Culinary Uses and Arugula Microgreen Salad Ideas
Creating delicious arugula and microgreen salad combinations showcases the versatility of your homegrown harvest. The peppery, nutty flavor of arugula microgreens adds sophistication to everyday meals and makes your urban gardening efforts truly worthwhile.
Flavor Profile
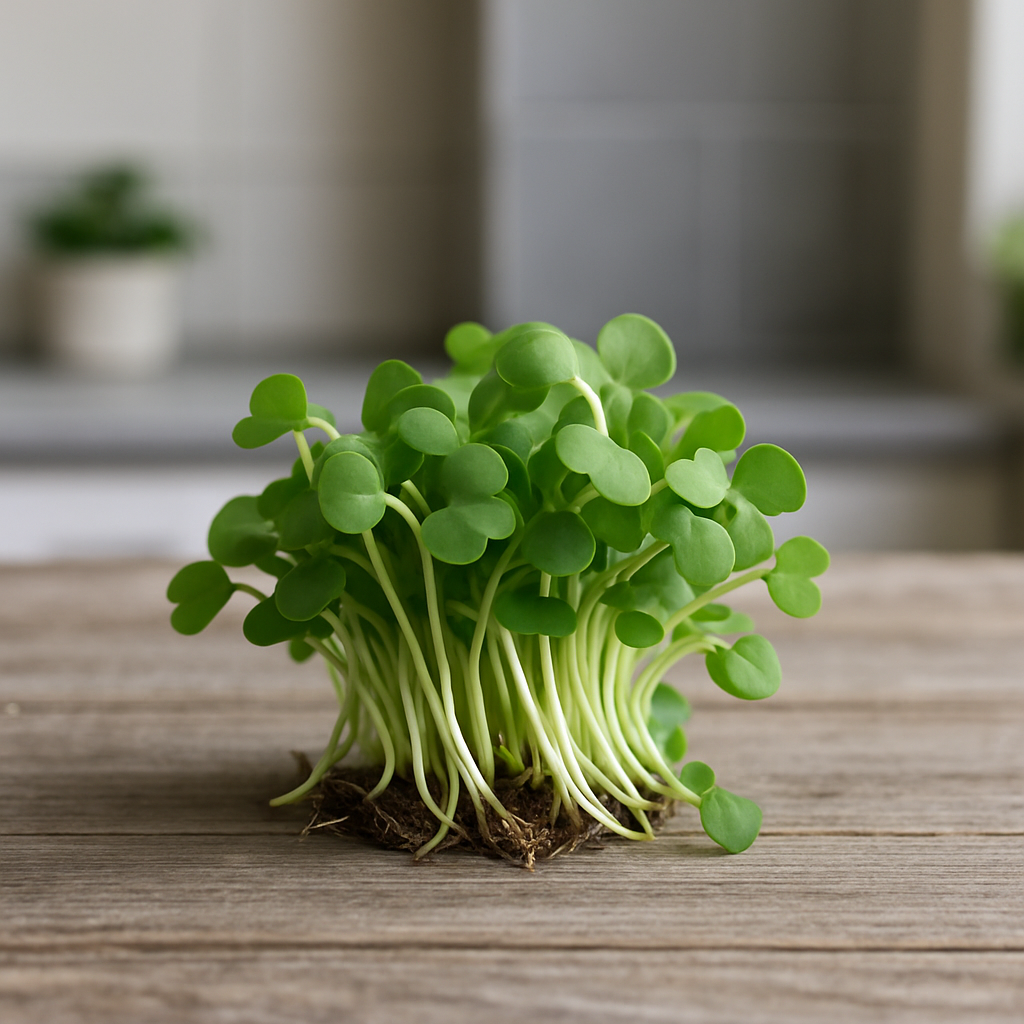
- Peppery: Mild spice that enhances dishes
- Nutty: Subtle earthy undertones
- Fresh: Clean, vibrant taste
- Balanced: Less bitter than mature arugula
Quick Recipe: Arugula Microgreen Power Salad
Ingredients:
- 2 cups fresh arugula microgreens
- 1 cup cherry tomatoes, halved
- ¼ cup toasted pine nuts
- 2 oz goat cheese, crumbled
- 2 tbsp olive oil
- 1 tbsp lemon juice
- Salt and pepper to taste
Instructions: Gently toss microgreens with tomatoes and pine nuts. Whisk olive oil and lemon juice, drizzle over salad. Top with goat cheese and season.
Breakfast Applications
- Avocado toast topping
- Omelet garnish
- Smoothie bowl decoration
- Breakfast sandwich layer
- Scrambled egg mix-in
Lunch & Dinner Uses
- Pizza garnish after baking
- Pasta salad ingredient
- Sandwich and wrap filling
- Soup garnish
- Grain bowl component
Gourmet Applications
- Appetizer plate garnish
- Charcuterie board accent
- Fine dining presentations
- Cocktail garnish
- Artisanal bread topping
Frequently Asked Questions
How long does it take to grow arugula microgreens?
Arugula microgreens typically take 8-12 days to grow from seed to harvest. They’re ready when they reach about 2 inches tall with fully developed cotyledons (seed leaves) and possibly the first true leaves appearing. The exact timing can vary based on temperature, light conditions, and growing environment.
Do arugula microgreens need to be soaked before planting?
No, arugula microgreens do not need to be soaked before planting. In fact, soaking is not recommended for arugula seeds because they are mucilaginous, meaning they develop a gel-like coating when wet. This coating can actually hinder germination, so it’s best to plant them directly on moist growing medium.
What do arugula microgreens taste like?
Arugula microgreens have a zesty, peppery, and nutty flavor profile. They offer the characteristic spiciness of mature arugula but are much milder and less bitter. The young leaves provide a fresh, clean taste with subtle earthy undertones that make them perfect for adding a gentle kick to salads, sandwiches, and various dishes.
Are arugula microgreens nutritious?
Yes, arugula microgreens are extremely nutritious and considered a superfood. They contain 8 times more calcium, 5 times more vitamins A, C, and K, and 4 times more iron than iceberg lettuce. They’re also rich in antioxidants, contain 20-25% protein, and provide all essential amino acids, making them one of the most nutrient-dense foods you can grow at home.
How do you harvest arugula microgreens?
Harvest arugula microgreens by cutting them with clean scissors just above the soil level when they’re about 2 inches tall. Stop watering 12 hours before harvest to ensure the greens are dry. After cutting, rinse them gently in cool water, pat dry with paper towels, and use immediately or store in the refrigerator for up to one week.
Can you grow arugula microgreens without soil?
Yes, you can grow arugula microgreens without soil using hydroponic methods. Popular soil alternatives include coconut coir, hemp fiber mats, paper towels, or specialized growing pads. These soilless mediums work well for microgreens because the plants rely on stored seed energy for growth and don’t require the nutrients that soil provides for longer-term plants.
Why are my arugula microgreens growing unevenly?
Uneven growth in arugula microgreens is usually caused by inconsistent seed distribution, uneven watering, or poor light exposure. To fix this, ensure you distribute seeds evenly across the growing surface, level your growing medium, water uniformly, and rotate trays regularly for even light exposure. Proper seed density is also crucial – seeds should be close but not overlapping.
Start Your Arugula Microgreens Journey Today
Growing arugula microgreens at home transforms any urban space into a productive garden that delivers fresh, nutritious greens in just over a week. This simple gardening habit can improve your daily routine while providing restaurant-quality ingredients for your meals.
Your Next Steps:
- Gather your basic supplies and seeds
- Set up your growing space near a light source
- Start with one tray to learn the process
- Document your growth timeline with photos
- Experiment with different recipes and uses
Benefits You’ll Enjoy:
- Fresh, nutrient-dense greens year-round
- Significant savings on premium microgreens
- Reduced environmental impact from local growing
- Quick satisfaction with 8-12 day harvests
- Perfect addition to any urban living space
Remember: Microgreens are a fun way to add fresh greens to your meals, and this simple gardening habit can transform urban spaces into greener, more productive environments with minimal effort. Start small, be consistent, and enjoy the process of growing your own superfood!


