Hydroponic microgreens are young vegetable or herb plants grown without soil, using a nutrient-rich water solution instead. Instead of planting seeds in soil, growers use a growing medium like coco coir, rock wool, or grow mats, which helps hold the seeds in place and supports root growth.
In Simple Words:
Hydroponic microgreens are small plants (like spinach, mustard, or basil) grown in water with nutrients, not in soil. They are ready to harvest in 7–14 days and are packed with nutrients.
Growing hydroponic microgreens at home has revolutionized how we approach fresh, nutrient-dense food production. Whether you’re a beginner looking to start your first hydroponic microgreens system or an experienced grower wanting to optimize your setup, this comprehensive guide covers everything you need to know about how to grow hydroponic microgreens successfully indoors.
Hydroponic microgreens offer incredible advantages over traditional soil-based growing: faster germination, cleaner harvests, reduced risk of soil-borne diseases, and the ability to grow fresh greens year-round regardless of climate conditions. The question “can you grow microgreens hydroponically” is answered with a resounding yes – and often with superior results.
Visual Story Timeline: From Setup to Harvest
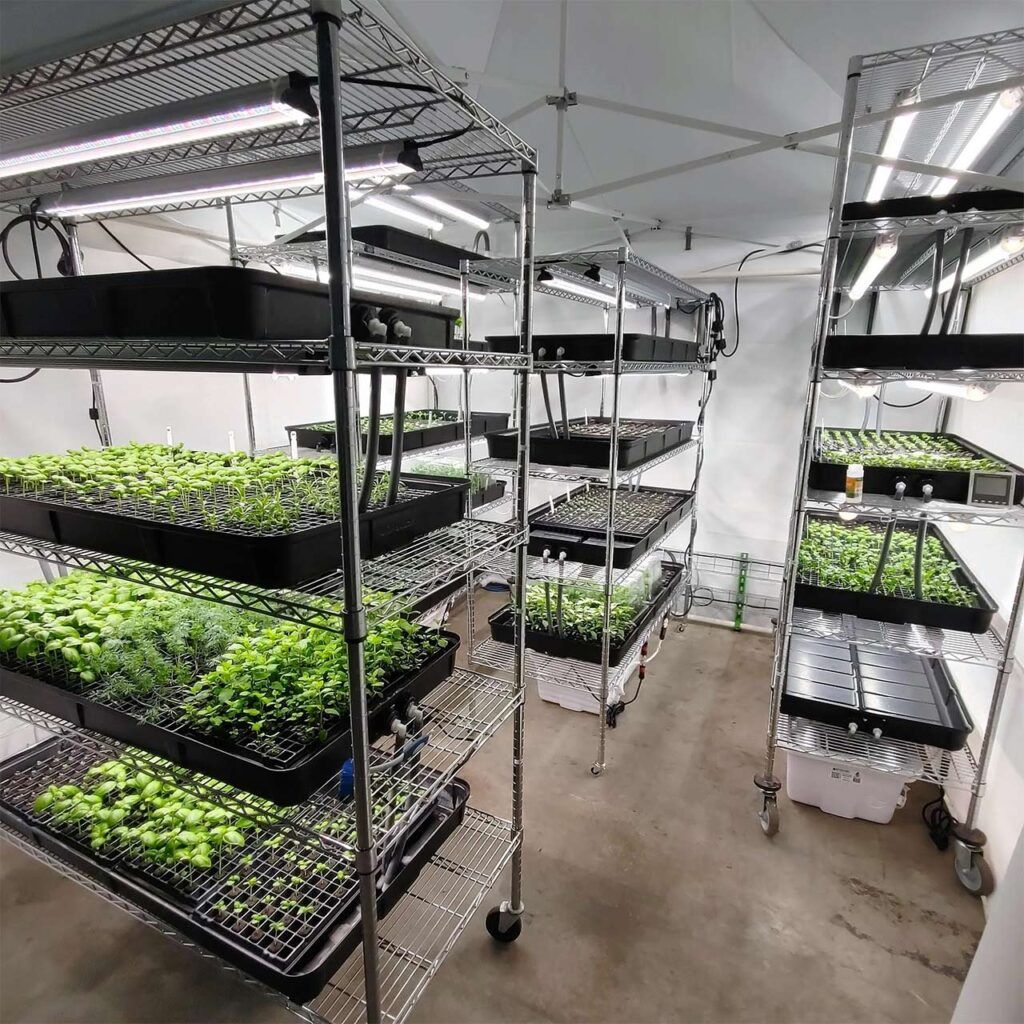
Day 0: System Setup
Professional hydroponic microgreens system ready for planting. Notice the multi-tier design maximizing growing space in minimal area.
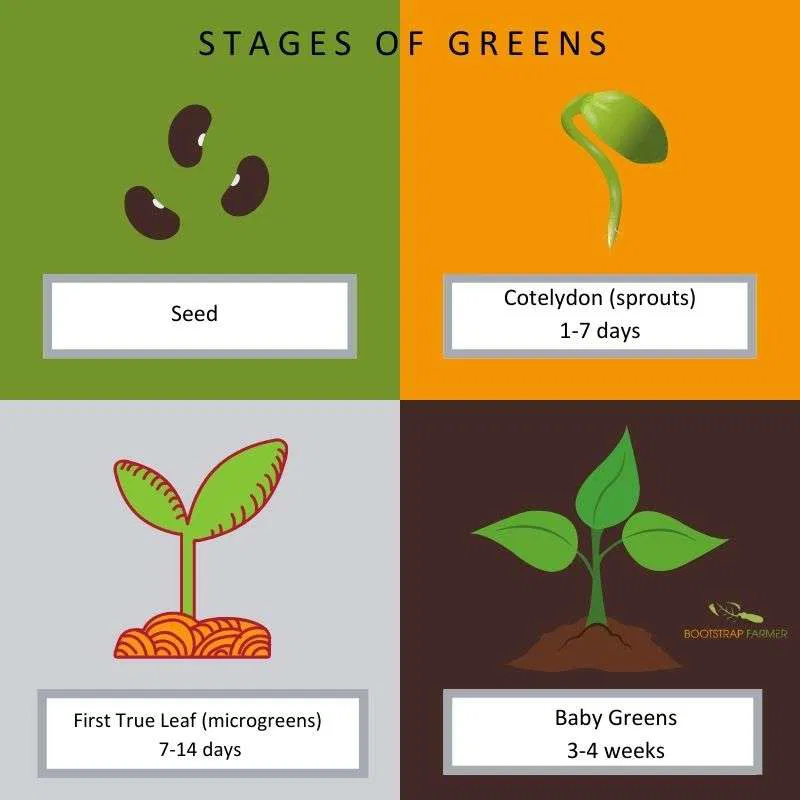
Days 1-7: Growth Progression
Visual timeline showing microgreens development from germination through cotyledon emergence to harvest-ready stage.
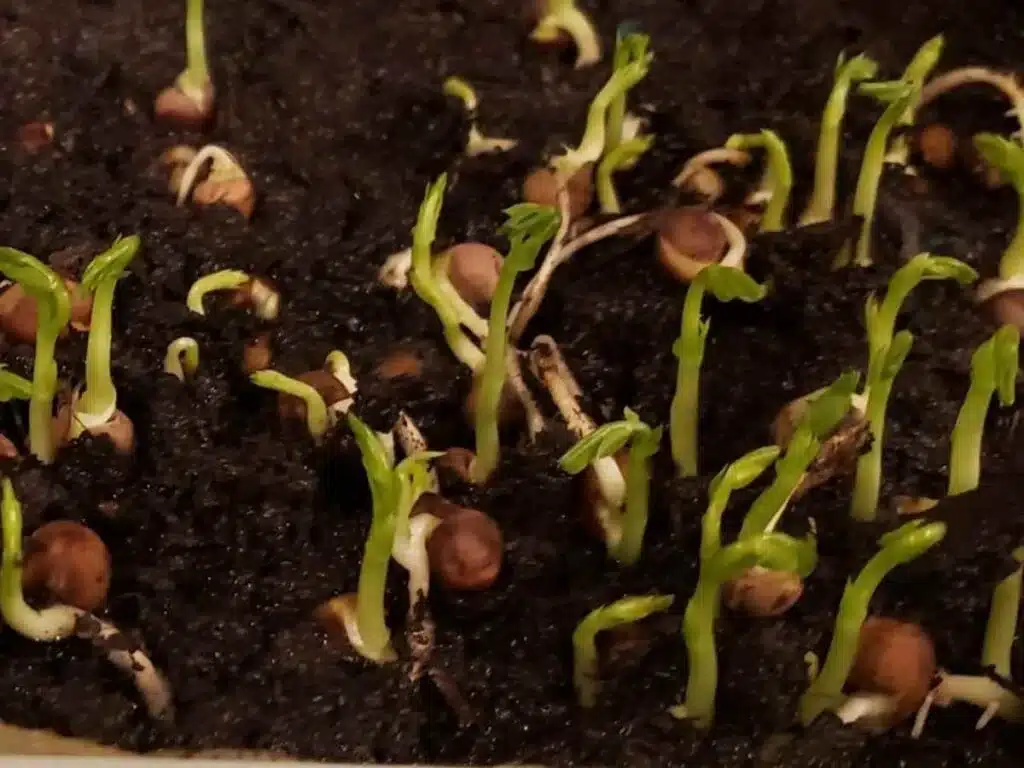
Day 4: Emergence
Healthy microgreens emerging from growing medium, showing characteristic dense growth pattern of properly seeded trays.
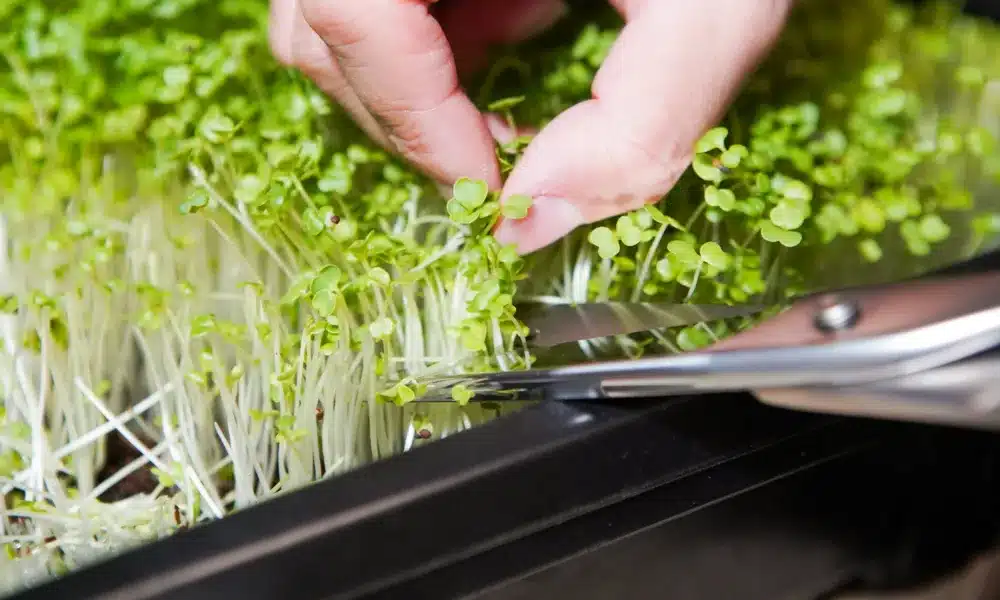
Days 7-14: Harvest Time
Perfect harvest timing showing microgreens at peak nutrition and flavor, ready for cutting just above the growing medium.
Complete Step-by-Step Hydroponic Microgreens Process
Essential Equipment for Your Hydroponic Microgreens System
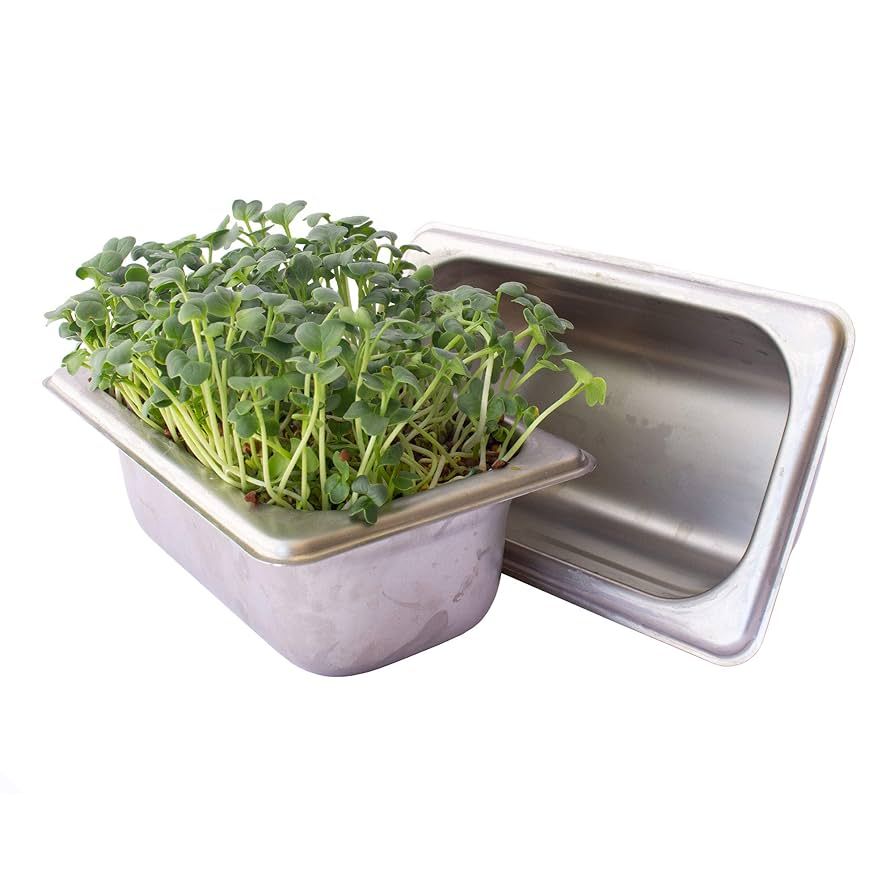
- Stainless steel sprouting trays or growing containers
- Growing mediums (coco coir, hemp mats, or biostrate)
- Seeds suitable for hydroponic cultivation
- pH testing strips and adjustment solutions
- Spray bottle for misting
- LED grow lights (optional but recommended)
Step 1: Prepare Your Hydroponic System
Water pH Balance: This is crucial for hydroponic microgreens success. Test your water pH using strips – aim for 6.0 (acceptable range 5.5-6.5). Most tap water needs adjustment using lemon juice to lower pH.
Tray Preparation: Pour 2 cups of pH-balanced water into your growing tray, ensuring even distribution. Place your chosen growing medium (we recommend coco coir for beginners) and saturate thoroughly.
Pro Tip: Use filtered water when possible to remove chlorine, which can inhibit germination in some seeds.
Step 2: Seed Selection and Preparation
Choose seeds specifically suited for hydroponic cultivation. Some varieties that thrive include:
Easy Starters
- Radish microgreens (hydroponically)
- Arugula microgreens (hydroponically)
- Broccoli
- Mustard varieties
Intermediate
• Kale varieties
• Beet microgreens
• Lentil microgreens
• Cilantro microgreens
Step 3: Seeding Your Hydroponic Microgreens
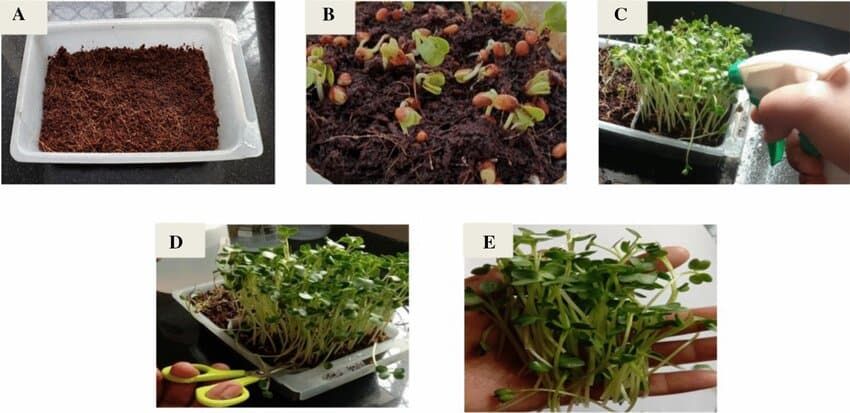
Spread seeds evenly across your saturated growing medium. Seeding density varies by variety:
- Small seeds (arugula, broccoli): 2-3 tablespoons per 10×20 tray
- Medium seeds (radish, mustard): 3-4 tablespoons per tray
- Large seeds (peas, sunflower): 1/4 to 1/2 cup per tray
Mist seeds thoroughly with 10-12 sprays, ensuring every seed is moistened.
Step 4: Blackout Period (Days 1-4)
Cover seeded trays with another tray (misted on the inside) to create a humidity dome. This blackout period forces seedlings to stretch and develop strong stems.
Daily care: Mist every 12 hours with 10 evenly distributed sprays. Check that growing medium stays moist but not waterlogged.
Warning: Maintain temperature between 65-75°F. Higher temperatures increase mold risk.
Step 5: Light Exposure and Growth (Days 5-10)
Uncover trays when cotyledon leaves emerge (typically day 4-5). Gradually introduce light – indirect sunlight or LED grow lights work excellently.
Watering transition: Switch from misting to bottom watering. Add water to tray channels, keeping level at half the channel height.
Monitor daily for proper moisture levels by lifting a corner of the growing medium – it should feel damp but not soggy.
Step 6: Harvesting Your Hydroponic Microgreens
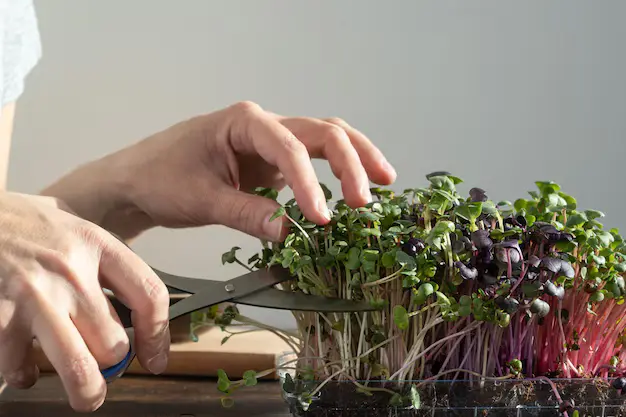
Most hydroponic microgreens are ready to harvest in 7-14 days when the first true leaves begin to appear.
Harvesting Methods:
- Cut and come again: Trim just above growing medium
- Root harvest: Pull entire plant including roots
- Best timing: Early morning or evening for maximum freshness
Post-Harvest Care:
- Rinse harvested microgreens in cold water
- Dry completely using towels or fan
- Store loosely in refrigerator
- Use within 5-7 days for best quality
Aeroponics vs Hydroponics for Microgreens
Understanding the difference between aeroponics vs hydroponics microgreens helps you choose the right system for your needs.
Hydroponic Microgreens
• Suitable for home use
• Uses growing mediums (coco coir, hemp, etc.)
• Easier for beginners
• Lower initial investment
• More forgiving watering schedule
Aeroponic Microgreens
• Better for commercial operations
• Roots suspended in air, misted with nutrients
• Faster growth rates
• Higher yields
• Requires more technical knowledge
Adapting Your Hydroponic Microgreens to Different Climates
Hot Climate Challenges
High temperatures and humidity create ideal conditions for mold and rapid moisture loss. Here’s how to adapt:
- Temperature control: Use air conditioning or fans to maintain 65-75°F growing temperatures
- Humidity management: Increase air circulation, use dehumidifiers if necessary
- Shorter blackout period: Reduce covering time to 3-4 days instead of 4-5
- More frequent monitoring: Check moisture levels twice daily
- Strategic timing: Plant during cooler months for easier management
Cold Climate Adaptations
Low temperatures slow germination and growth, but hydroponic systems excel in controlled indoor environments:
- Heating solutions: Use seedling heat mats to maintain consistent temperatures
- Extended germination: Allow 1-2 extra days for initial sprouting
- Supplemental lighting: LED grow lights become essential during shorter winter days
- Insulation: Move growing area away from cold windows and drafts
- Water temperature: Use room temperature water for mixing solutions
Seasonal Considerations
Hydroponic microgreens allow year-round growing, but seasonal adjustments optimize results:
Spring/Summer Growing
• Monitor for pest issues
• Take advantage of natural light
• Focus on heat-tolerant varieties
• Increase ventilation
Fall/Winter Growing
• Focus on cool-season varieties
• Invest in quality grow lights
• Extend growing cycles slightly
• Maintain consistent temperatures
Automated Hydroponic Microgreens Systems
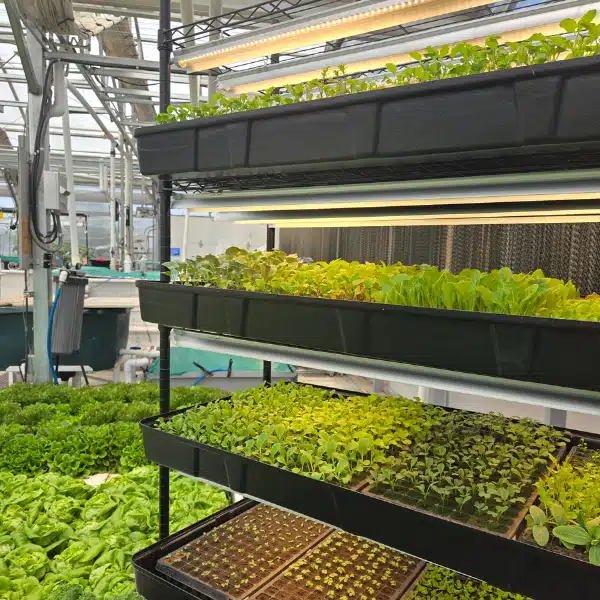
For serious growers or those wanting convenience, automated hydroponic microgreens systems offer several advantages:
Benefits of Automation
- Consistent watering schedules
- Automated nutrient delivery
- Climate control integration
- Remote monitoring capabilities
- Reduced labor requirements
- Higher success rates
Popular Automated Features
- Timer-controlled misting systems
- LED light scheduling
- Temperature and humidity sensors
- Mobile app integration
- Automatic seed dispensers
- Harvest notification systems
Best Nutrients for Hydroponic Microgreens
Important Note: Most microgreens don’t require additional nutrients since they rely on stored energy in the seed. However, adding nutrients can improve yields and flavor for certain varieties.
When to Use Nutrients
- Growing cycles longer than 14 days
- Larger seed varieties (peas, sunflower)
- When growing to baby green stage
- To enhance flavor profiles
- For maximum yield optimization
Recommended Solutions
- Diluted general hydroponics (1/4 strength)
- Organic kelp meal solutions
- Fish emulsion (very diluted)
- Specialized microgreen nutrients
- Balanced N-P-K formulations
Application Tips
- Start with plain water for first 3-4 days
- Introduce nutrients gradually
- Bottom water with nutrient solution
- Monitor EC/TDS levels
- Flush with plain water before harvest
Biggest Problems Growing Hydroponic Microgreens (And Solutions)
Problem #1: Mold Growth
Symptoms: White, fuzzy growth on seeds or growing medium, musty odor, seedling death
Causes:
- Excessive moisture
- Poor air circulation
- High humidity
- Contaminated equipment
Solutions:
- Improve ventilation with fans
- Reduce watering frequency
- Sterilize all equipment
- Use hydrogen peroxide rinse
Problem #2: Uneven Germination
Symptoms: Patchy growth, bare spots in trays, inconsistent seedling height
Causes:
- Uneven seeding density
- Irregular moisture distribution
- Old or poor-quality seeds
- Inconsistent growing medium
Solutions:
- Use measured seed quantities
- Level growing medium carefully
- Pre-soak larger seeds
- Source fresh, high-quality seeds
Problem #3: Weak, Leggy Growth
Symptoms: White, fuzzy growth on seeds or growing medium, musty odor, seedling death
Causes:
- Insufficient light
- Too long blackout period
- Overcrowding
- Poor air circulation
Solutions:
- Add grow lights or increase intensity
- Reduce blackout time
- Thin overcrowded areas
- Improve ventilation
Frequently Asked Questions About Hydroponic Microgreens
Can you grow microgreens hydroponically?
Absolutely! Hydroponic microgreens often outperform soil-grown varieties with faster germination, cleaner harvests, and reduced disease risk. Using growing mediums like coco coir, hemp mats, or biostrate provides excellent results. The key is maintaining proper moisture levels and pH balance throughout the growing cycle.
What is the best hydroponic microgreens system for beginners?
Start with a simple tray system using stainless steel sprouting trays and coco coir growing medium. This combination is forgiving for beginners, cost-effective, and produces consistent results. As you gain experience, you can upgrade to multi-tier systems or automated setups for increased production.
Do hydroponic microgreens need nutrients?
Most microgreens grow successfully without added nutrients, relying on stored energy in the seed. However, adding diluted hydroponic nutrients (1/4 strength) can boost growth and improve yields, especially for longer-growing varieties like peas and sunflower. Start with plain water and introduce nutrients after day 4-5 if desired.
How long do hydroponic microgreens take to grow?
Most hydroponic microgreens are ready to harvest in 7-14 days. Fast-growing varieties like radish and arugula can be harvested in 7-10 days, while larger seeds like sunflower and peas may take 10-14 days. The hydroponic method often reduces growing time by 1-2 days compared to soil growing.
What are the biggest problems growing hydroponic microgreens?
The most common issues include mold growth from excess moisture, uneven germination from poor seeding technique, and weak growth from inadequate lighting. These problems are easily prevented with proper ventilation, consistent watering practices, quality seeds, and appropriate light levels. Start with easier varieties like radish or broccoli to build confidence.
Can you reuse hydroponic growing mediums?
Some growing mediums can be reused, while others cannot. Coco coir and perlite can be sterilized and reused multiple times, making them cost-effective long-term options. Hemp mats and biostrate are typically single-use. Stainless steel mesh systems are completely reusable and environmentally friendly.
How much space do I need for hydroponic microgreens at home?
You can start hydroponic microgreens in as little as 2 square feet of counter space. A standard 10×20 inch tray fits easily on most kitchen counters. For larger production, vertical growing systems maximize yield in minimal floor space – a 4-tier system provides 32 square feet of growing area in just 8 square feet of floor space.
Your Journey to Hydroponic Microgreens Success
Growing hydroponic microgreens at home opens up a world of fresh, nutritious possibilities right at your fingertips. Whether you’re interested in growing radish microgreens hydroponically for their peppery bite, cultivating arugula microgreens hydroponically for gourmet salads, or exploring the full spectrum of varieties from beet microgreens to cilantro microgreens, the hydroponic method offers superior control and consistent results.
Remember that success with hydroponic microgreens comes from understanding the fundamentals: proper pH balance, adequate moisture management, appropriate lighting, and quality seeds. Start with easier varieties like radish or broccoli, master the basics, then expand your growing repertoire to include more challenging varieties like lentil microgreens or specialty crops.
Recommended Next Steps:
Week 1-2: Getting Started
- Purchase basic equipment and seeds
- Set up your first tray system
- Start with radish or broccoli microgreens
- Document your process and results
Month 1-3: Expanding Skills
- Try 3-4 different varieties
- Experiment with different growing mediums
- Optimize your lighting setup
- Consider upgrading to multi-tier systems
Ready to Scale Up?
Once you’ve mastered the basics of how to grow hydroponic microgreens, consider these advanced options:
- Automated systems: Invest in timer-controlled watering and lighting
- Aquarium integration: Explore aquaponics for nutrient-rich growing solutions
- Commercial varieties: Research specialty seeds for unique flavors and colors
- Season extension: Use your skills to grow fresh greens year-round indoors
🌱 Start your hydroponic microgreens journey today and enjoy fresh, nutritious greens year-round! 🌱


