Microgreens for garnish have revolutionized how home cooks and professional chefs approach food presentation. These tiny powerhouses pack incredible flavor and visual appeal into dishes that would otherwise look ordinary. Whether you’re plating a simple weeknight dinner or preparing an elaborate meal for guests, the best microgreens for garnish can transform your culinary creations from mundane to magazine-worthy.
Learning how to use microgreens effectively means understanding that these aren’t just pretty decorations – they’re functional ingredients that add texture, flavor, and nutritional value to every dish they touch. From peppery radish microgreens that add a kick to creamy soups, to delicate pea shoots that provide sweet freshness on grilled meats, each variety brings its own personality to the plate.
In this comprehensive guide, we’ll explore everything you need to know about microgreens for garnish, including which varieties work best for different dishes, step-by-step growing instructions for urban gardeners, and professional plating techniques that will make your food look restaurant-quality.
Your Microgreens for Garnish: A 14-Day Visual Journey
Day 1: Starting Your Microgreens for Garnish
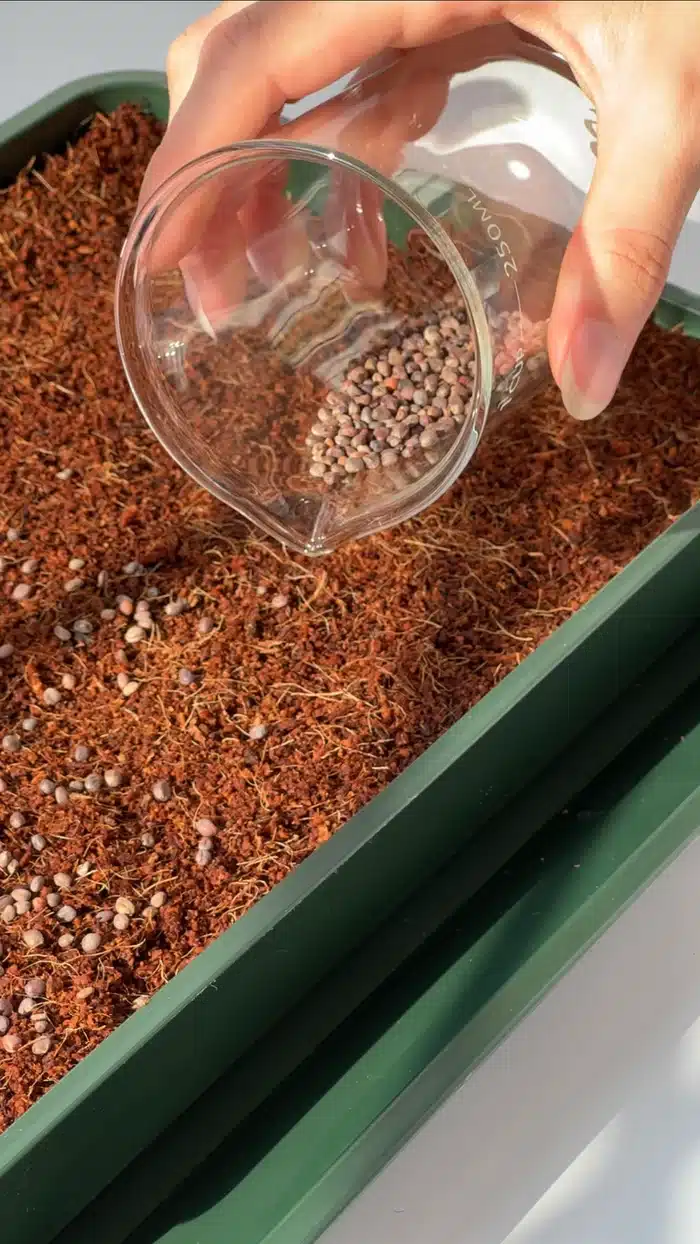
Today marks the beginning of your microgreens journey. Seeds are soaked (if required) and evenly distributed across growing medium. The excitement is palpable – these tiny seeds will become beautiful microgreens for garnish in just two weeks.
✓ Seeds planted in growing medium
✓ Proper spacing achieved
✓ Initial watering completed

Day 3: First Signs of Life
The magic begins! Tiny green shoots are pushing through the growing medium. Some varieties like radish microgreens are already showing strong germination, while others are just beginning to stir. This is when patience starts paying off.
✓ 70-80% germination visible
✓ Blackout period continues
✓ Bottom watering maintained

Day 5: Reaching for Light
Time to remove the blackout covers! Your future microgreens for garnish are ready to see light. They’ve developed pale stems and are starting to reach upward. The cotyledons (seed leaves) are beginning to unfold.
✓ Blackout covers removed
✓ First light exposure
✓ Stems elongating properly

Day 7: Going Green
The transformation is remarkable! Your microgreens for garnish are now showing beautiful green color as chlorophyll develops. The cotyledons have opened fully and are photosynthesizing actively. Growth accelerates noticeably from this point.
✓ Vibrant green color developed
✓ Cotyledons fully opened
✓ Rapid growth phase begins

Day 10: Peak Flavor Development
Your microgreens for garnish are approaching their flavor peak. Some fast-growing varieties like radish are nearly ready for harvest, while others are developing their characteristic tastes. The anticipation builds as harvest approaches.
✓ Maximum flavor concentration
✓ Ideal garnish size reached
✓ First true leaves appearing

Day 14: Harvest Time!
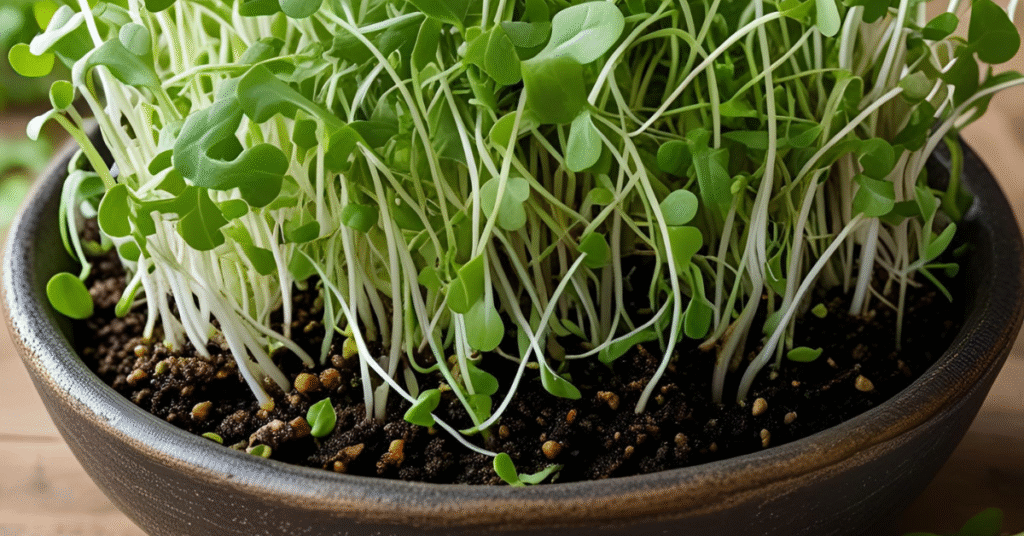
Success! Your microgreens for garnish are ready for their starring role. They’ve reached the perfect size with fully developed cotyledons and possibly first true leaves. The flavors are concentrated and the colors vibrant – exactly what you need for beautiful garnishing.
✓ Perfect harvest size achieved
✓ Ready for garnish applications
✓ Restaurant-quality results

Step-by-Step Guide: Growing the Best Microgreens for Garnish
1. Prepping Your Trays

Start with clean 10×20 growing trays and high-quality growing medium. Fill trays with 1-2 inches of potting mix or coconut coir, then level and lightly compress the surface. This foundation is crucial for successful microgreens for garnish production.
2. Soaking Seeds
Some varieties like pea shoots and sunflower microgreens benefit from 6-12 hour soaking. This jumpstarts germination for faster, more uniform growth. Smaller seeds like radish and arugula can be planted directly without soaking.
Pro Tip: Use room temperature water and rinse seeds after soaking to remove any natural inhibitors.
3. Seeding Density
Proper seed density is critical for microgreens for garnish success. Aim for even coverage without overcrowding. Most varieties need 15-30 grams per 10×20 tray, but larger seeds like sunflowers require more space.
• Broccoli: 15-20g per tray
• Radish: 30-35g per tray
• Pea shoots: 200-275g per tray
4. Blackout Period

Cover trays with blackout domes or stack them for 3-5 days. This encourages strong stem development and uniform germination. The darkness mimics natural soil conditions and prevents premature leaf development.
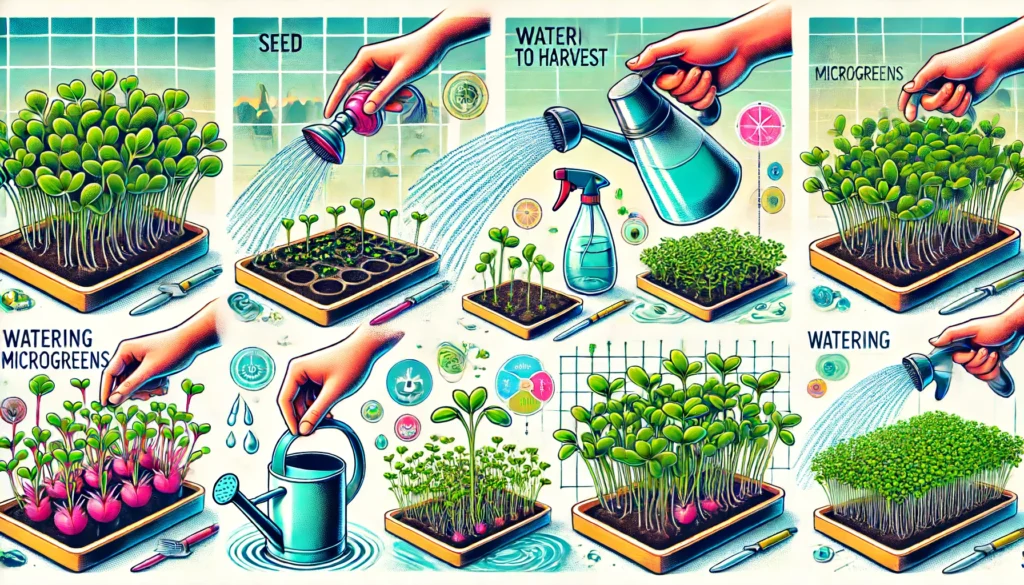
5. Watering Schedule

Use bottom watering to prevent mold and seed displacement. Water daily during blackout, then adjust based on growing medium moisture. Consistent moisture without oversaturation is key for healthy microgreens for garnish.
6. Harvesting with Scissors
Harvest your microgreens for garnish using clean, sharp scissors. Cut just above the soil line when cotyledons are fully developed but before true leaves appear. This timing ensures the best flavor and texture for garnishing.
Timing: Most varieties are ready in 7-14 days from germination.
Best Microgreens for Garnish: Top Varieties for Every Dish

Mild & Sweet Varieties
Pea Shoots
These charming microgreens for garnish bring sweetness and whimsy to every plate. Their delicate tendrils and fresh, sweet flavor make them perfect for spring dishes, stir-fries, and elegant soup garnishes.
Sunflower Microgreens
The ultimate crunchy addition to any dish. Sunflower microgreens provide nutty flavor and substantial texture that work equally well on chocolate desserts and grilled chicken breasts.
Broccoli Microgreens
Fast-growing and incredibly nutritious, broccoli microgreens offer mild cabbage flavor that complements rather than competes with main ingredients. Excellent for healthy garnishing and daily use.
Peppery Varieties
Pea Shoots
These charming microgreens for garnish bring sweetness and whimsy to every plate. Their delicate tendrils and fresh, sweet flavor make them perfect for spring dishes, stir-fries, and elegant soup garnishes.
Sunflower Microgreens
The ultimate crunchy addition to any dish. Sunflower microgreens provide nutty flavor and substantial texture that work equally well on chocolate desserts and grilled chicken breasts.
Broccoli Microgreens
Fast-growing and incredibly nutritious, broccoli microgreens offer mild cabbage flavor that complements rather than competes with main ingredients. Excellent for healthy garnishing and daily use.

Specialty Color Varieties
Red Amaranth
Deep red color adds elegance and sophistication to any dish. The mild, earthy flavor pairs beautifully with creamy dishes and white plates.
Cilantro Microgreens
Concentrated citrusy punch perfect for Mexican cuisine, curries, and any dish needing fresh, bright flavor contrast.
Purple Kohlrabi
Green leaves with stunning purple stems create beautiful color combinations while providing mild cabbage flavor.
How to Use Microgreens: Professional Plating Techniques

Garnishing Like a Professional Chef
Learning how to use microgreens effectively means understanding that timing and placement are everything. These delicate greens should always be added as the final touch, just before serving, to maintain their crisp texture and vibrant appearance.
Gentle Handling: Use tweezers or your fingertips to place microgreens precisely where you want them. Avoid crushing the delicate stems.
Color Contrast: Choose microgreens that create visual contrast with your dish. Red radish on white sauce, green pea shoots on dark meat.
Flavor Pairing: Match microgreen flavors to complement your dish. Peppery varieties with rich foods, sweet varieties with lighter dishes.
Specific Application Techniques
Soups & Liquid Dishes
Float microgreens for garnish on the surface of soups just before serving. They add color contrast and fresh flavor that cuts through rich, creamy textures. Use 5-10 pieces per bowl for elegant presentation.
Meat & Protein Dishes
Arrange microgreens alongside or on top of proteins to add freshness and visual appeal. The contrast between cooked meat and fresh greens creates restaurant-quality presentation that impresses guests.
Sandwiches & Wraps
Layer microgreens between ingredients or as a topmost layer before closing. Their crisp texture and concentrated flavors elevate simple sandwiches to gourmet level with minimal effort.

Adapting to Your Climate: Year-Round Microgreens for Garnish Success
Hot Climate Challenges
Growing microgreens for garnish in hot climates requires extra attention to temperature and humidity control. High temperatures can cause rapid growth, bolting, and increased susceptibility to mold.
- Move growing trays to coolest areas
- Increase air circulation with fans
- Reduce blackout time by 1-2 days
- Water more frequently but less volume
Cold Climate Solutions
Cold weather slows germination and growth, but microgreens for garnish can still thrive with proper adjustments. The key is maintaining consistent warmth during the critical germination phase.
- Use heating mats during germination
- Extend blackout period by 1-2 days
- Place trays near heat sources
- Allow extra growing time
Humid Climate Management
High humidity can lead to mold problems and reduced air circulation. Success with microgreens for garnish in humid climates requires vigilant moisture management and air flow.
- Improve ventilation significantly
- Reduce watering frequency
- Use hydrogen peroxide solution
- Monitor daily for mold signs
Seasonal Growing Tips
Spring & Summer
Optimal growing season for most microgreens for garnish. Natural light and warmth accelerate growth, but watch for overheating and maintain consistent moisture levels.
Best varieties: All varieties thrive, especially heat-tolerant ones like mustard and arugula.
Fall & Winter
Slower growth but often better flavor concentration. Indoor growing becomes essential in many regions. Consider supplemental lighting for consistent results.
Best varieties: Cold-tolerant varieties like pea shoots, kale, and broccoli microgreens.
Reflection & Lifestyle Impact: More Than Just Pretty Garnishes

Daily Freshness Revolution
Growing microgreens for garnish has become a simple way to add fresh, vibrant elements to daily meals. There’s something deeply satisfying about snipping your own greens and watching ordinary dishes transform into something special.
Urban Space Optimization
Even the smallest urban apartments can accommodate a thriving microgreens operation. A simple shelf by a window can provide fresh garnishes year-round, making city living feel more connected to nature and healthy eating.
The Unexpected Benefits
What started as a quest for better-looking food has evolved into something more meaningful. The ritual of tending to these tiny plants, even for just a few minutes each day, creates a moment of calm in busy schedules.
Cost-Effective Quality
Restaurant-quality microgreens for garnish at home cost pennies compared to purchasing them fresh. A single packet of seeds provides weeks of beautiful garnishes.
Minimal Time Investment
Five minutes daily for watering and monitoring yields impressive results. It’s gardening that fits into modern lifestyles without overwhelming commitments.
Family Engagement
Kids love watching the rapid transformation from seed to garnish. It’s an easy introduction to gardening that doesn’t require outdoor space or major equipment.
Simple Truth: Microgreens are a fun way to add fresh greens to your meals. This simple gardening habit can improve your daily routine, and urban spaces can become greener with minimal effort. The confidence that comes from growing your own garnishes translates to more adventurous cooking and entertaining.
Advanced Techniques: Taking Your Microgreens for Garnish to the Next Level
Creating Custom Microgreen Mixes

Professional chefs often create signature microgreen blends that become their restaurants’ calling cards. You can develop your own custom mixes by combining varieties with similar growing requirements but complementary flavors and colors.
Spicy Medley
Combine radish, mustard, and arugula for a peppery mix perfect for rich, creamy dishes.
Sweet & Mild Blend
Mix pea shoots, sunflower, and broccoli for versatile, family-friendly garnishes.
Rainbow Mix
Combine red amaranth, purple kohlrabi, and standard greens for maximum visual impact.
Successive Planting for Continuous Harvest
The secret to always having fresh microgreens for garnish is successive planting. Start new trays every 3-4 days to ensure a constant supply of fresh garnishes at various stages of growth.
Weekly Schedule Example:
Monday: Start fast varieties (radish, broccoli)
Wednesday: Start medium varieties (arugula, mustard)
Friday: Start slow varieties (cilantro, basil)
Sunday: Harvest and restart cycle
Storage and Preservation

Proper storage extends the life of harvested microgreens for garnish from 3-4 days to over a week. The key is maintaining humidity while preventing excess moisture that leads to decay.
- Wrap gently in slightly damp paper towels
- Store in perforated plastic bags
- Keep refrigerated at 35-40°F
- Check daily and remove any wilted pieces
Frequently Asked Questions About Microgreens for Garnish
How do you garnish with microgreens?
To garnish with microgreens, simply sprinkle them over your finished dish just before serving. Add them to salads for color and texture, layer them on sandwiches and wraps for freshness, or float them on soups for vibrant contrast. The key is adding them at the last moment to maintain their delicate crispness and prevent wilting from heat.
What are the best microgreens for garnish?
The best microgreens for garnish include red radish for peppery bite and striking color, pea shoots for sweet freshness and whimsical appearance, sunflower microgreens for nutty crunch and substantial texture, red amaranth for elegant deep red color, cilantro for citrusy punch, mustard for spicy tang, and arugula for mild peppery flavor. Choose based on your dish’s flavor profile and color scheme.
How long do microgreens take to grow for garnish?
Most microgreens for garnish take 7-14 days to grow from seed to harvest. Fast-growing varieties like radish and broccoli can be ready in 5-8 days, while others like cilantro and basil may take 14-21 days. The ideal harvest time is when the cotyledons (seed leaves) are fully developed but before true leaves appear, ensuring optimal flavor and texture for garnishing.
Can you eat microgreens raw as garnish?
Yes, microgreens are typically eaten raw and make excellent garnishes. They’re harvested young and tender, with concentrated flavors and nutrients that are perfect for adding fresh elements to cooked dishes. Always wash them gently before use and add them to dishes just before serving to maintain their crisp texture and vibrant appearance.
How do you store microgreens for garnish?
Store harvested microgreens in the refrigerator wrapped in slightly damp paper towels inside a sealed container or perforated plastic bag. They stay fresh for 5-7 days when stored properly at 35-40°F. For best results, harvest them just before use, or keep them growing in their trays and cut portions as needed for maximum freshness.
What’s the difference between microgreens and sprouts for garnish?
Microgreens are grown in soil or growing medium with light exposure and harvested when first true leaves appear (7-14 days), while sprouts are grown in water without soil or light and harvested much earlier (2-5 days). Microgreens have more developed flavors, better visual appeal for garnishing, and higher nutrient density compared to sprouts.
Do microgreens regrow after harvesting for garnish?
Most microgreens don’t regrow after harvesting because they’re cut at the stem level, removing the growing point. However, some varieties like pea shoots and wheatgrass may produce a second, smaller harvest if cut above the first leaf node. For continuous supply of fresh garnishes, it’s best to start new trays every week in succession rather than relying on regrowth.
Start Your Microgreens for Garnish Journey Today
Growing the best microgreens for garnish at home isn’t just about improving your food’s appearance – it’s about connecting with your food, developing new skills, and discovering how small changes can make big differences in your daily meals. Whether you’re garnishing a simple weeknight dinner or preparing for a special occasion, these tiny greens will elevate every dish they touch.
Start Simple
Begin with easy varieties like radish or broccoli microgreens. Success with these builds confidence for more challenging varieties.
Plan Succession
Start new trays every few days to ensure continuous harvest of fresh microgreens for all your garnishing needs.
Experiment Freely
Try different varieties, create custom mixes, and discover which micro herbs garnish work best with your favorite dishes.
Your Next Steps
The world of microgreens for garnish is vast and exciting. Start with one variety that appeals to you, master the basics, and gradually expand your growing operation. Remember, every professional chef started with their first attempt at growing these remarkable plants.
As you develop your skills in growing and using microgreens, you’ll find that what began as a quest for better-looking food becomes a rewarding hobby that connects you with fresh, healthy eating and sustainable growing practices. Your urban space, no matter how small, can become a source of fresh, restaurant-quality garnishes that will impress family and friends while nourishing your body and soul.


