Understanding the key differences between microgreens and sprouts is essential for any home gardener. While both offer incredible nutritional benefits, their growing methods, taste profiles, and safety considerations vary significantly.
Understanding the Fundamentals
When exploring the world of home-grown nutrition, many gardeners ask: “What’s the difference between microgreens vs sprouts?” These two nutrient-dense foods might appear similar at first glance, but they represent completely different stages of plant development and require distinct growing approaches.
Microgreens Defined
Microgreens are young vegetable greens harvested 7-21 days after germination when the first true leaves appear. They’re grown in soil or growing medium and require light for photosynthesis, developing concentrated flavors and vibrant colors.
Sprouts Defined
Sprouts are germinated seeds harvested 3-5 days after soaking, before true leaves develop. They’re grown in water without soil, requiring only moisture and darkness, resulting in crisp, mild-flavored shoots consumed whole including roots.
Key Insight
While both start from the same seeds, the growing method and harvest timing create dramatically different products in terms of taste, texture, nutrition, and safety considerations.
Visual Comparison: Microgreens vs Sprouts

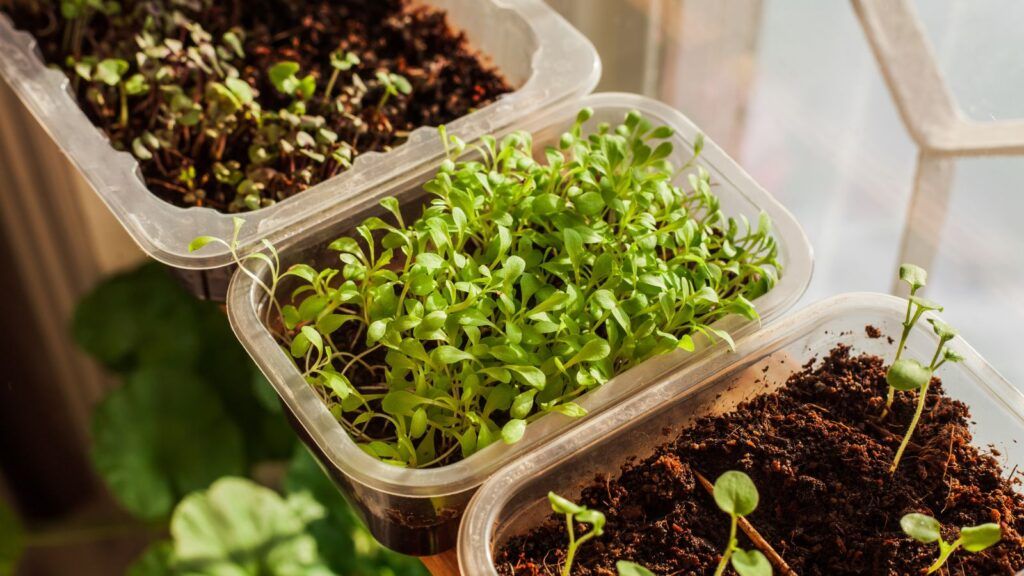
Microgreens Growing Setup
- Grown in soil or growing medium
- Require light for photosynthesis
- Harvested with scissors above soil line
- 7-21 days growing time

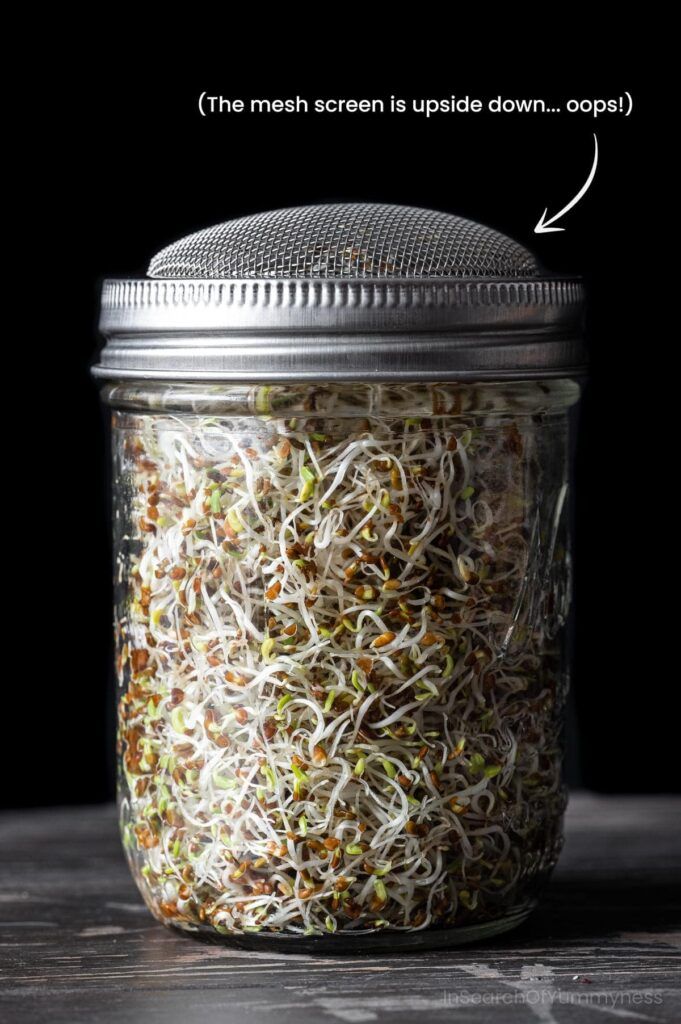
Sprouts Growing Setup
- Grown in water (hydroponic method)
- No light required for growth
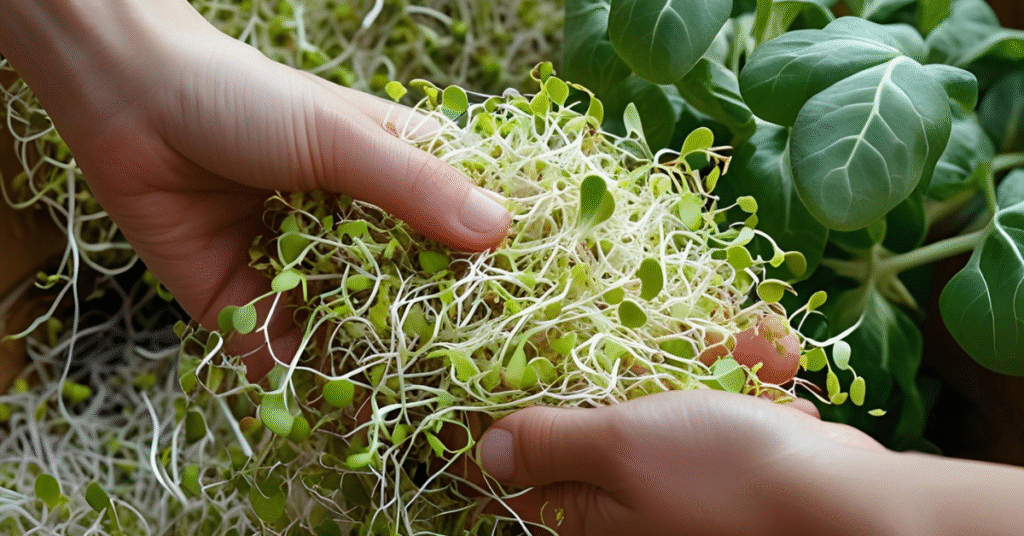
- Consumed whole including roots
- 3-5 days growing time
Growing Time and Methods: Microgreens vs Sprouts
Microgreens Timeline
Days 1-3: Seed soaking and germination
Days 4-7: Cotyledon emergence and early growth
Days 8-21: True leaves development and harvest
Sprouts Timeline
Day 1: Seed soaking (8-12 hours)
Days 2-3: Initial germination and root emergence
Days 4-5: Ready for harvest
Growing Speed Comparison
Research shows that sprouts can be harvested approximately 78% faster than microgreens. This makes sprouts ideal for quick nutrition boosts, while microgreens offer more developed flavors and higher nutritional density.
Microgreens Average: 10-14 days
Sprouts Average: 3-5 days
Step-by-Step Growing Instructions
Growing Microgreens
Materials Needed
- Shallow growing trays with drainage holes
- Organic potting mix or growing medium
- Certified organic seeds
- Spray bottle for misting
- Sharp scissors or knife
- Grow lights (optional)
1. Prepare Growing Medium
Fill shallow trays with 1-2 inches of moist potting mix. Level surface and ensure proper drainage.
2. Sow Seeds
Sprinkle seeds evenly across surface. Press gently but don’t bury. Use approximately 1-2 tablespoons per tray.
3. Provide Blackout Period
Cover with another tray or cloth for 3-5 days to encourage germination.
4. Expose to Light
Once sprouted, remove cover and place in bright, indirect light or under grow lights.
5. Water and Care
Mist daily and water from bottom. Maintain consistent moisture without waterlogging.
6. Harvest
Cut above soil line when first true leaves appear (7-21 days).
Growing Sprouts
Materials Needed
- Wide-mouth mason jars
- Cheesecloth or mesh lids
- Certified organic sprouting seeds
- Clean water
- Rubber bands
- Dark storage area
1. Soak Seeds
Place 1-2 tablespoons seeds in jar. Cover with water and soak 8-12 hours.
2. Drain and Rinse
Drain water through mesh lid. Rinse thoroughly with fresh water and drain completely.
3. Store in Darkness
Place jar at 45-degree angle in dark area. Ensure proper drainage.
4. Rinse Twice Daily
Rinse with fresh water morning and evening. Always drain completely to prevent mold.
5. Final Light Exposure
On harvest day, expose to indirect light for 2-4 hours to develop chlorophyll.
6. Harvest
Remove from jar, rinse thoroughly, and consume entire sprout including roots.
Nutritional Comparison: Microgreens vs Sprouts
Key Nutritional Findings
Recent scientific studies reveal significant nutritional differences between microgreens and sprouts. Research published in Molecules journal demonstrates that microgreens contain up to 40% more phytochemicals than sprouts, while sprouts excel in certain amino acids and proteins.
Microgreens Nutritional Profile
| Vitamin C | High |
| Carotenoids | Very High |
| Chlorophyll | Excellent |
| Antioxidants | High |
Sprouts Nutritional Profile
| Protein | High |
| Amino Acids | High |
| B-Complex Vitamins | Good |
| Fiber | Moderate |
Scientific Research Findings
40%
Higher phytochemicals in microgreens vs mature plants
3-5x
More protein content in certain sprout varieties
25%
Higher vitamin C in microgreens vs sprouts
Safety Considerations: Microgreens vs Sprouts
Critical Safety Information
Understanding food safety differences between microgreens and sprouts is crucial for home growers. According to the FDA, there have been over 30 reported foodborne illness outbreaks associated with sprouts since 1996, while microgreens have significantly fewer safety incidents.
Microgreens Safety Profile
Lower contamination risk: Grown in soil-based medium reduces pathogen exposure
Better drainage: Proper drainage prevents stagnant water conditions
Shorter exposure: Harvested above soil line, avoiding root contamination
Light exposure: UV light naturally reduces harmful bacteria
Sprouts Safety Concerns
Warm, humid conditions: Ideal environment for bacteria growth (E. coli, Salmonella)
Stagnant water risk: Improper drainage can lead to contamination
Whole plant consumption: Eating roots increases contamination risk
No light exposure: Dark conditions don’t provide natural bacteria reduction
Safety Best Practices
For Microgreens:
- Use sterile growing medium
- Maintain proper air circulation
- Harvest with clean tools
- Refrigerate immediately after harvest
For Sprouts:
- Use certified pathogen-free seeds
- Rinse thoroughly and frequently
- Maintain proper drainage
- Consider cooking before consumption
Taste and Flavor Profiles
Microgreens Flavor Characteristics
Microgreens deliver concentrated, intense flavors that often surpass their mature counterparts. The flavor profile depends heavily on the variety and growing conditions.
Arugula Microgreens: Peppery, spicy kick with nutty undertones
Radish Microgreens: Sharp, spicy bite with crisp texture
Basil Microgreens: Sweet, aromatic with hints of anise
Pea Microgreens: Sweet, fresh pea flavor with tender crunch
Sprouts Flavor Characteristics
Sprouts generally offer milder, more subtle flavors with a focus on texture and crunch. The short growing time results in less developed flavor compounds.
Alfalfa Sprouts: Mild, slightly sweet with fresh grass notes
Mung Bean Sprouts: Crisp, nutty flavor with satisfying crunch
Broccoli Sprouts: Mild cabbage flavor with slight peppery notes
Clover Sprouts: Sweet, mild flavor with delicate texture
Culinary Applications
Best Uses for Microgreens:
- Gourmet garnishes for fine dining
- Flavor enhancers for salads
- Toppings for avocado toast
- Finishing touches for soups
- Sandwich and wrap fillings
Best Uses for Sprouts:
- Crunchy salad additions
- Stir-fry ingredients
- Smoothie nutritional boosts
- Asian cuisine preparations
- Raw food diet components
Harvesting and Storage Guide
Harvesting Microgreens

Use sharp, clean scissors: Cut stems about 1/2 inch above soil line
Harvest timing: Early morning when plants are fully hydrated
Avoid soil contact: Never let cut microgreens touch growing medium
Harvesting Sprouts

Rinse thoroughly: Remove any hulls or unsprouted seeds
Gentle handling: Use clean hands to remove sprouts from jar
Complete consumption: Eat entire sprout including roots and stem
Storage Guidelines
Microgreens Storage:
- Store in refrigerator at 39-41°F (4-5°C)
- Use breathable containers lined with paper towels
- Consume within 5-7 days for best quality
- Avoid washing until ready to eat
- Keep away from moisture and direct air
Sprouts Storage:
- Store in refrigerator immediately after harvest
- Use within 2-3 days for optimal freshness
- Keep in ventilated containers
- Rinse before storage if needed
- Monitor for signs of spoilage daily
Popular Varieties for Home Growing
Top Microgreens Varieties
| Broccoli Microgreens Rich in sulforaphane, mild cabbage flavor, excellent for beginners | 10-14 days |
| Sunflower Microgreens Nutty flavor, high in vitamin E, substantial texture | 8-12 days |
| Radish Microgreens Spicy kick, fast growing, vibrant colors | 5-7 days |
| Pea Microgreens Sweet flavor, high yields, great for salads | 7-14 days |
Top Sprouts Varieties
| Alfalfa Sprouts Mild flavor, high in vitamins K and C, classic choice | 3-5 days |
| Mung Bean Sprouts Crunchy texture, nutty flavor, Asian cuisine favorite | 3-5 days |
| Broccoli Sprouts Cancer-fighting properties, mild flavor, research-backed benefits | 4-6 days |
| Lentil Sprouts Protein-rich, earthy flavor, quick germination | 2-4 days |
Frequently Asked Questions
What’s the main difference between microgreens vs sprouts?
The main difference between microgreens vs sprouts lies in their growth stage and growing method. Microgreens are harvested 7-21 days after germination when true leaves appear, grown in soil with light exposure. Sprouts are harvested 3-5 days after germination, grown in water without light, and consumed whole including roots.
Are microgreens more nutritious than sprouts?
Yes, microgreens generally contain higher levels of vitamins, minerals, and antioxidants compared to sprouts. Research shows microgreens can have up to 40% more phytochemicals than mature plants, while sprouts excel in protein content and amino acids. Both offer excellent nutrition but in different concentrations.
Which is safer to eat: microgreens or sprouts?
Microgreens are generally considered safer than sprouts. The FDA has documented over 30 foodborne illness outbreaks linked to sprouts since 1996, while microgreens have significantly fewer safety incidents. The soil-based growing method and light exposure of microgreens reduce contamination risks compared to the warm, humid, water-based environment required for sprouts.
Can I use the same seeds for both microgreens and sprouts?
Yes, you can use the same certified organic seeds for both microgreens and sprouts. The difference lies in the growing method and harvest timing, not the seeds themselves. However, ensure seeds are specifically labeled as safe for sprouting/microgreens to avoid contamination risks.
How do the flavors compare between microgreens vs sprouts?
Microgreens typically have more intense, concentrated flavors compared to sprouts. The longer growing time allows flavor compounds to develop fully. Sprouts tend to be milder and more subtle, with emphasis on texture and crunch rather than bold flavors. This makes microgreens ideal for gourmet applications and sprouts perfect for adding texture to dishes.
Which is easier to grow for beginners?
Sprouts are generally easier for complete beginners due to their simple water-based growing method and faster harvest time (3-5 days). However, microgreens aren’t much more difficult and offer greater variety and nutrition. Both can be successfully grown indoors year-round with minimal equipment.
What’s the cost difference between growing microgreens vs sprouts?
Sprouts are typically more cost-effective initially, requiring only seeds, jars, and mesh lids. Microgreens require additional investment in growing trays, soil/growing medium, and potentially grow lights. However, microgreens often provide better value per serving due to their higher nutritional density and longer shelf life.
Making the Right Choice for Your Garden
Understanding the differences between microgreens vs sprouts empowers you to make informed decisions about your home growing journey. Both offer unique benefits that can enhance your nutrition and culinary experiences.
Choose Microgreens If You Want:
- Intense, concentrated flavors
- Higher nutritional density
- Gourmet presentation
- Longer shelf life
- Lower safety risks
Choose Sprouts If You Want:
- Quick harvests (3-5 days)
- Lower initial costs
- Minimal equipment needed
- Crunchy textures
- Simple growing process
Remember: You don’t have to choose just one! Many successful home growers enjoy both microgreens and sprouts, taking advantage of their unique benefits and growing cycles for year-round fresh nutrition.


