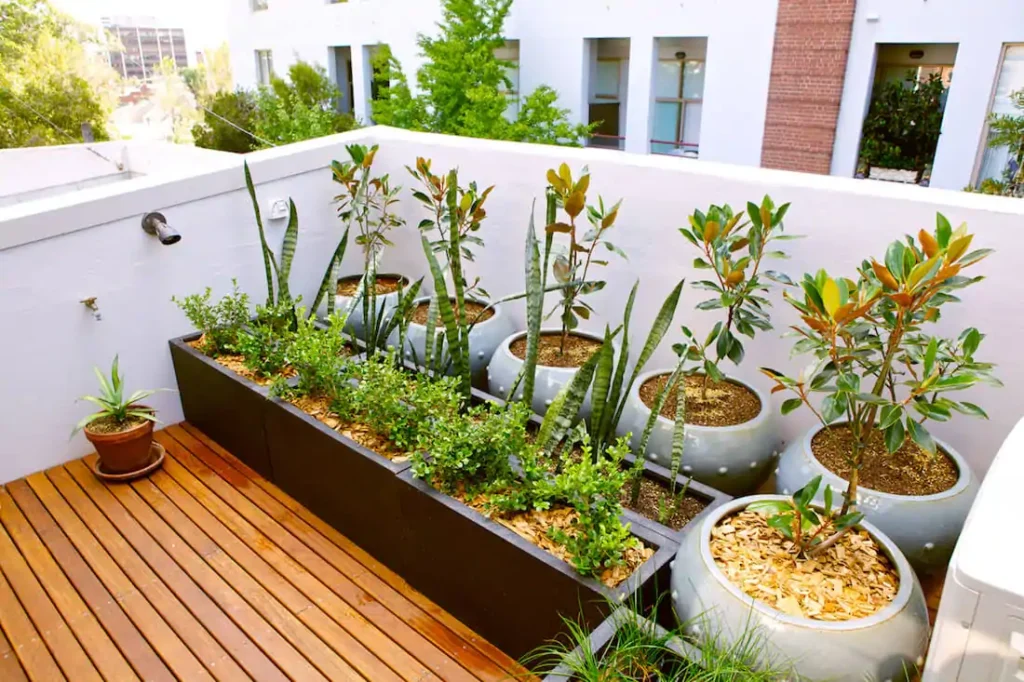
Starting an urban sprouts farm is one of the most rewarding ways to bring fresh, nutrient-dense food into your home while embracing sustainable living. Whether you’re living in a small apartment, have limited outdoor space, or simply want to enjoy fresh greens year-round, an urban sprouts farm offers the perfect solution for modern city dwellers.
Unlike traditional gardening that requires significant space and time, your urban sprouts farm can flourish in just a few square feet of indoor space. These tiny powerhouses pack 4-40 times more nutrients than their mature counterparts, making them an excellent investment for your health and wallet. With the right setup and knowledge, you’ll be harvesting fresh microgreens in just 7-14 days.
Why Urban Sprouts Farms Are Perfect for 2024
- Space Efficient: Grow 20+ varieties in the space of a small bookshelf
- Fast Returns: Harvest in 7-14 days vs. months for traditional vegetables
- Year-Round Production: Indoor growing means no seasonal limitations
- High Profit Potential: Microgreens sell for $15-25 per pound
- Minimal Investment: Start with basic supplies under $50
Visual Story: Your Urban Sprouts Farm Journey
Follow along as we document the complete lifecycle of an urban sprouts farm from setup to harvest. These real-world examples show exactly what to expect at each stage.
Day 0: Setting Up Your Urban Sprouts Farm
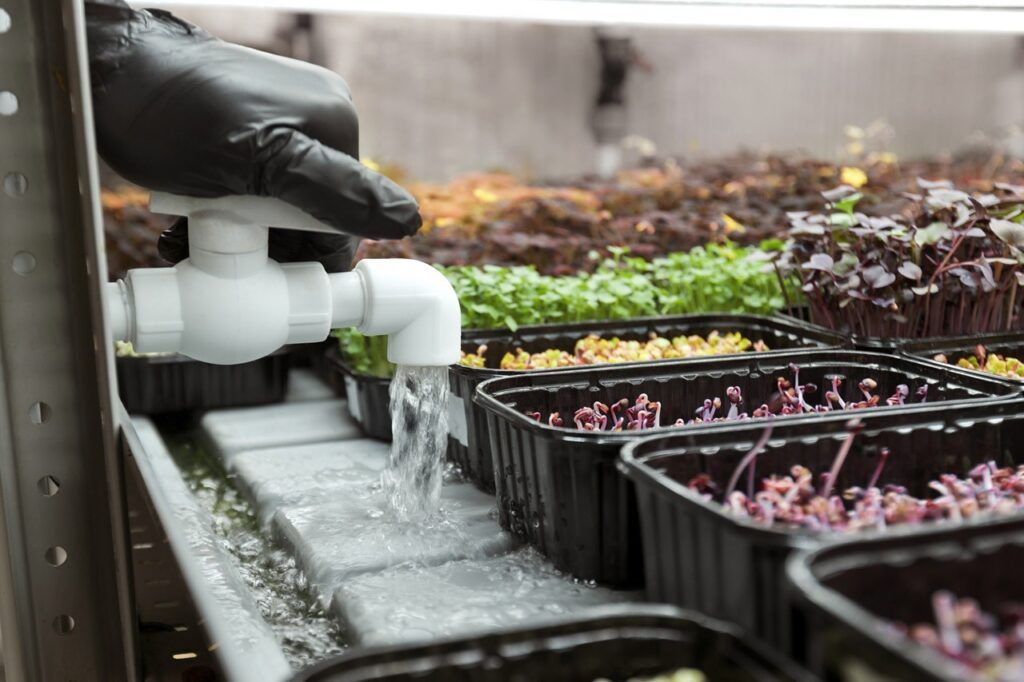
Your urban sprouts farm begins with proper setup. Organize your growing trays, ensure adequate lighting, and create a clean, controlled environment for optimal growth.
Day 1-3: Germination Stage

Seeds begin sprouting within 1-3 days in your urban sprouts farm. Keep them covered and moist during this critical phase.
Day 4-7: Early Growth
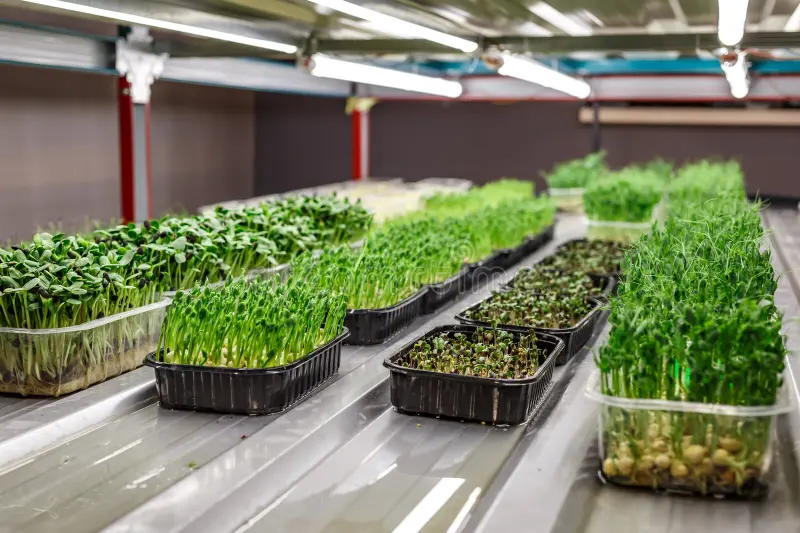
Seedlings develop their first true leaves and begin photosynthesis. This is when your urban sprouts farm really comes alive!
Day 8-14: Harvest Ready
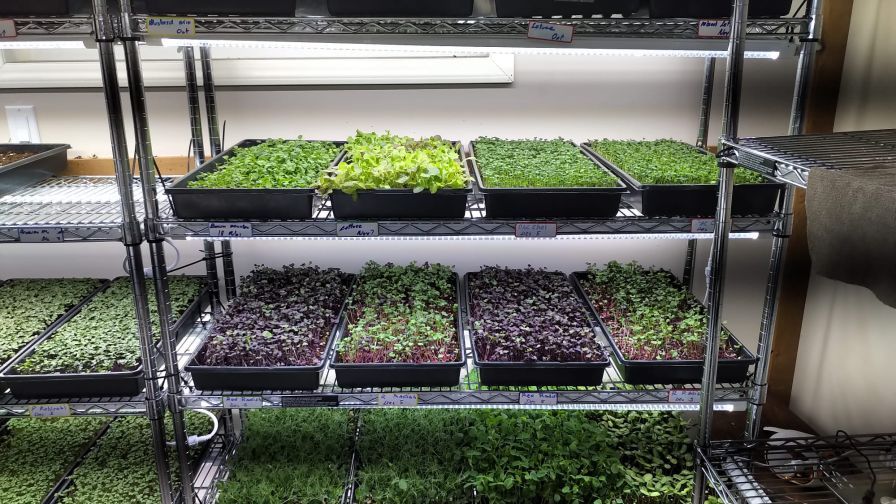
Your microgreens are ready to harvest! Look for 2-4 inch tall plants with well-developed first leaves – the perfect stage for maximum nutrition and flavor.
Step-by-Step Urban Sprouts Farm Setup Guide
Step 1: Choose Your Urban Sprouts Farm Location
The success of your urban sprouts farm depends heavily on location. Look for a spot that receives good natural light or can accommodate grow lights. A south-facing window is ideal, but any area with 4-6 hours of indirect sunlight will work.
Pro Tip for Urban Sprouts Farm Location
Avoid areas with temperature fluctuations like near heating vents or air conditioning units. Consistent temperatures between 65-75°F work best for most microgreens.
Step 2: Gather Your Urban Sprouts Farm Supplies
Building an urban sprouts farm requires minimal equipment, making it accessible for beginners. Here’s your complete shopping list:
Essential Equipment
- 1020 Growing trays (with drainage)
- Solid bottom trays (no holes)
- Organic potting mix or coconut coir
- Microgreen seeds (organic preferred)
- Spray bottle for misting
- Sharp scissors or harvesting knife
Optional Upgrades
- LED grow lights (for winter)
- Seedling heat mat
- pH testing kit
- Small fan for air circulation
- Measuring cups for seeds
- Blackout domes for germination
Step 3: Prepare Growing Trays for Your Urban Sprouts Farm
Proper tray preparation is crucial for urban sprouts farm success. Clean trays prevent contamination and ensure healthy growth.
- Clean all trays with diluted bleach solution (1:10 ratio)
- Rinse thoroughly and let air dry
- Place drainage tray inside solid bottom tray
- Add 1-2 inches of moistened growing medium
- Level surface gently without compacting
- Pre-water from bottom until surface is moist

Step 4: Seeding Your Urban Sprouts Farm
Proper seeding density is critical for urban sprouts farm success. Too sparse and you waste space; too dense and plants compete for resources.
Seeding Rates by Type
| Broccoli | 2 tbsp per 1020 tray |
| Radish | 2 tbsp per 1020 tray |
| Sunflower | 1 cup per 1020 tray |
| Pea Shoots | 1 cup per 1020 tray |
Seeding Technique
- Soak large seeds (peas, sunflower) for 4-8 hours
- Distribute seeds evenly across surface
- Gently press seeds into growing medium
- Mist lightly with spray bottle
- Cover with blackout dome or another tray
- Place in dark, warm location (65-75°F)
Step 5: Managing Growth in Your Urban Sprouts Farm
Once germination begins, your urban sprouts farm needs consistent care to produce healthy, vibrant microgreens.
Days 1-3: Blackout Phase
- Keep trays covered and in darkness
- Mist daily to maintain moisture
- Check for mold or unusual odors
- Maintain temperature at 65-75°F
Days 4-7: Light Introduction
- Remove covers when shoots are 1-2 inches tall
- Provide 12-16 hours of light daily
- Continue bottom watering as needed
- Watch for color development
Days 8-14: Final Growth
- Reduce watering frequency
- Ensure good air circulation
- Monitor for harvest readiness
- Prepare for harvesting
Step 6: Harvesting Your Urban Sprouts Farm
Proper harvesting technique ensures maximum yield and quality from your urban sprouts farm.


Harvesting Best Practices
- Harvest in the morning for best flavor and longest shelf life
- Cut just above the soil line to avoid contamination
- Use clean, sharp tools to prevent crushing
- Harvest when cotyledons are fully expanded
Urban Sprouts Farm Growth Timeline
| Microgreen | Growth Time | Cost |
|---|---|---|
| Amaranth | 10 days – 2 weeks | $$ |
| Arugula | 2–3 weeks | $ |
| Basil | 2–3 weeks | $$ |
| Beet | 2–3 weeks | $$ |
| Broccoli | 10 days – 2 weeks | $ |
| Chard | 2–3 weeks | $$ |
| Cilantro | 2–3 weeks | $ |
| Dill | 2–3 weeks | $$ |
| Kale | 10 days – 2 weeks | $$–$$$ |
| Kohlrabi | 10 days – 2 weeks | $$ |
| Mizuna | 10 days – 2 weeks | $$ |
| Mustard | 10 days – 2 weeks | $–$$$ |
| Pac Choy | 10 days – 2 weeks | $$ |
| Radish | 10 days – 2 weeks | $–$$ |
| Red-Veined Sorrel | 2–3 weeks | $$$$ |
💰 Cost Key:
$= Less than $10$$= $11–$25$$$= $26–$50$$$$= $50+
Fast Growers (5-7 days)
- Radish
- Mustard
- Cress
- Arugula
Medium Growers (7-10 days)
- Broccoli
- Kale
- Cabbage
- Mizuna
Slow Growers (10-14 days)
- Cilantro
- Basil
- Chard
- Beets
Adapting Your Urban Sprouts Farm to Different Climates
One of the biggest advantages of an urban sprouts farm is climate control. However, seasonal changes and local conditions can affect your success. Here’s how to adapt your urban sprouts farm for optimal year-round production.
Winter Challenges & Solutions
Challenge: Limited Natural Light
Winter days are shorter and sunlight is weaker, affecting growth rates in your urban sprouts farm.
Solution: Invest in LED grow lights providing 12-16 hours of light daily. Position lights 6-12 inches above trays.
Challenge: Cold Temperatures
Cold windows and drafts can slow germination and growth.
Solution: Use seedling heat mats and move your urban sprouts farm away from cold windows. Maintain 65-75°F consistently.
Challenge: Dry Indoor Air
Heating systems create dry conditions that can stress plants.
Solution: Use humidity trays with pebbles and water. Mist more frequently but avoid overwatering.
Summer Challenges & Solutions
Challenge: Excessive Heat
High temperatures can cause poor germination and bolting in your urban sprouts farm.
Solution: Provide shade during hottest parts of day. Use fans for air circulation and consider basement growing.
Challenge: Rapid Water Loss
Hot, dry conditions cause faster evaporation and stress.
Solution: Water more frequently but in smaller amounts. Use bottom watering to maintain consistent moisture.
Challenge: Pest Pressure
Warm weather can bring increased pest activity.
Solution: Maintain cleanliness, use screens on windows, and inspect trays daily for early detection.
Year-Round Urban Sprouts Farm Success Tips
Spring & Fall (Optimal Seasons)
- Take advantage of ideal temperatures (60-75°F)
- Experiment with new varieties
- Scale up production for peak growing season
- Perfect your techniques for challenging seasons
Climate Monitoring
- Use a thermometer/hygrometer for accurate readings
- Keep a growing log to track conditions
- Adjust varieties based on seasonal performance
- Have backup plans for extreme weather
Troubleshooting Your Urban Sprouts Farm
Even experienced growers encounter challenges. Here are the most common urban sprouts farm problems and their solutions.
Problem: Mold Growth in Urban Sprouts Farm
Symptoms:
- Fuzzy white, gray, or black growth on soil or seeds
- Musty or sour smell
- Wilting or discolored microgreens
- Slimy texture on growing medium
Solutions:
- Improve air circulation with a small fan
- Reduce watering frequency
- Use hydrogen peroxide solution (1:10 ratio)
- Ensure proper drainage in trays
- Start fresh with clean equipment
Problem: Poor Germination Rates
Symptoms:
- Less than 70% of seeds sprouting
- Uneven germination patterns
- Seeds rotting before sprouting
- Delayed germination timeline
Solutions:
- Check seed expiration dates
- Ensure proper temperature (65-75°F)
- Pre-soak large seeds (peas, sunflower)
- Maintain consistent moisture
- Test seeds from different suppliers
Problem: Leggy or Weak Growth
Symptoms:
- Tall, thin stems with small leaves
- Plants falling over or bending
- Pale or yellow coloration
- Weak, easily damaged stems
Solutions:
- Increase light intensity and duration
- Move lights closer to plants (6-12 inches)
- Reduce temperature slightly
- Ensure proper air circulation
- Avoid overcrowding seeds
Prevention is Key for Urban Sprouts Farm Success
Cleanliness
- Sanitize all equipment
- Use clean water
- Wash hands before handling
- Replace growing medium
Environment
- Monitor temperature
- Ensure air circulation
- Control humidity
- Provide adequate light
Quality Inputs
- Buy fresh, quality seeds
- Use sterile growing medium
- Filter or purify water
- Store seeds properly
How an Urban Sprouts Farm Transforms Your Lifestyle
Beyond the nutritional benefits, running an urban sprouts farm creates positive changes in daily routines and mindset. Here’s how this simple practice can enhance your life.
Daily Wellness Routine
Tending to your urban sprouts farm becomes a mindful morning ritual. The few minutes spent checking on your plants, misting trays, and observing growth provides a peaceful start to busy days.
This simple gardening habit can improve your daily routine by creating a connection with nature, even in the heart of the city. Many urban farmers report feeling more grounded and centered after establishing their growing practice.
Enhanced Nutrition
Microgreens are a fun way to add fresh greens to your meals without the expense and waste of store-bought produce that often wilts before use.
Having a constant supply of fresh microgreens means you’re more likely to include nutrient-dense foods in every meal, naturally improving your overall diet quality.
Living Space Enhancement
Urban spaces can become greener with minimal effort. Your urban sprouts farm adds life and color to apartments, creating a more vibrant living environment.
The presence of growing plants improves air quality and creates a sense of accomplishment that comes from nurturing life in an urban setting.
Financial Benefits
The economics of an urban sprouts farm are compelling. With microgreens selling for $3-5 per ounce in stores, growing your own saves significant money over time.
For those who scale up, selling excess microgreens to neighbors, local restaurants, or farmers markets can generate meaningful supplemental income from a small space.
Community Connection Through Urban Sprouts Farming
Urban sprouts farming often leads to unexpected community connections. Sharing growing tips with neighbors, trading seeds, or gifting fresh microgreens creates positive social interactions.
Seed Swapping
Exchange varieties with neighbors
Sharing Harvest
Gift fresh microgreens to friends
Teaching Others
Help others start their farms
Frequently Asked Questions
What is an urban sprouts farm?
An urban sprouts farm is a small-scale indoor growing operation that specializes in producing microgreens and sprouts in urban environments. These farms utilize minimal space, often in apartments, balconies, or small indoor areas, to grow nutrient-dense baby greens that can be harvested within 7-14 days. The concept combines sustainable agriculture with urban living, making fresh produce accessible to city dwellers regardless of outdoor space limitations.
How much space do I need to start?
You can start an urban sprouts farm in as little as 2-4 square feet of space. A single windowsill, kitchen counter, or small shelf can accommodate multiple growing trays. The beauty of urban sprouts farming is its scalability – you can start small with just one or two trays and expand as you gain experience. A typical 10″x20″ growing tray takes up less space than a laptop computer, making it perfect for apartment living.
What are the best microgreens for beginners?
The best microgreens for beginners include radish, broccoli, sunflower, and pea shoots. These varieties are forgiving, germinate quickly (1-3 days), grow fast (7-10 days to harvest), and have excellent flavor profiles. Radish microgreens are particularly beginner-friendly as they’re nearly foolproof and add a delicious peppery flavor to meals. Broccoli microgreens are also excellent for beginners, offering mild flavor and consistent growth patterns.
How long does it take to grow microgreens in an urban sprouts farm?
Most microgreens in an urban sprouts farm can be harvested within 7-14 days from seeding. Fast-growing varieties like radish and mustard can be ready in 5-7 days, while slower varieties like cilantro may take 10-14 days. The timeline depends on the variety, growing conditions, and temperature. During optimal spring and fall conditions, most microgreens reach harvest size quickly, while winter growing may add 2-3 days to the timeline.
Do I need special equipment for an urban sprouts farm?
Basic urban sprouts farm equipment includes shallow growing trays, growing medium (soil or hydroponic mats), seeds, a spray bottle, and scissors for harvesting. You can start with repurposed containers from your kitchen, making the initial investment very low. Optional equipment includes grow lights for winter growing, heating mats for faster germination, and specialized microgreen trays. Most beginners can start for under $50 and upgrade equipment as they gain experience.
Can I make money from an urban sprouts farm?
Yes, urban sprouts farms can be profitable! Microgreens sell for $15-25 per pound at farmers markets, $20-30 per pound to restaurants, and $3-5 per ounce retail. A small urban sprouts farm can produce 1-2 pounds per week, generating $60-200 monthly income. Success depends on local market demand, product quality, and consistent production. Many urban farmers start by selling to neighbors and local restaurants before expanding to farmers markets.
What are the common problems in urban sprouts farming and how to solve them?
Common urban sprouts farm problems include mold (solved by proper ventilation and avoiding overwatering), poor germination (use fresh seeds and maintain proper moisture), leggy growth (provide adequate light), and pest issues (maintain cleanliness). Most problems are easily prevented with proper technique and environmental control. The key is maintaining clean growing conditions, proper watering, adequate light, and good air circulation. Starting with quality seeds and sterile growing medium prevents most issues.
Start Your Urban Sprouts Farm Journey Today
Creating your own urban sprouts farm is one of the most rewarding ways to embrace sustainable living while ensuring access to fresh, nutrient-dense food. With minimal space, basic equipment, and just a few minutes of daily care, you can transform any urban space into a productive growing environment.
Your Next Steps
- Choose your growing location (windowsill, shelf, or counter)
- Gather basic supplies (trays, seeds, growing medium)
- Start with beginner-friendly varieties (radish, broccoli)
- Plant your first tray and begin the journey
- Document your progress and learn from each cycle
- Expand gradually as you gain confidence
Long-term Vision
- Fresh microgreens in every meal
- Reduced grocery bills and food waste
- Potential income from selling excess harvest
- Connection with sustainable food systems
- Skill development in urban agriculture
- Community building through shared knowledge
Remember: Every Expert Was Once a Beginner
Your urban sprouts farm doesn’t need to be perfect from day one. Start small, learn from each growing cycle, and celebrate the small victories. With each harvest, you’re not just growing microgreens – you’re growing knowledge, confidence, and connection to your food.
The urban farming community is always here to help. Don’t hesitate to ask questions, share your experiences, and learn from others who have walked this path before you.

